Category Archives: Reports

Garry Jones – Bottles

Club Meeting: 10 August 2022
Report by: Kieran FitzGerald

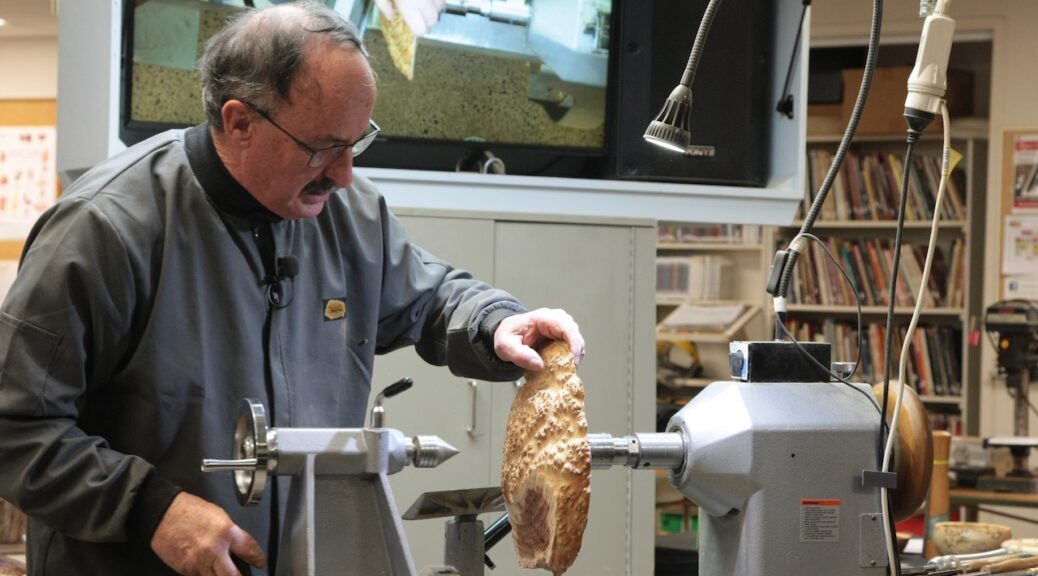
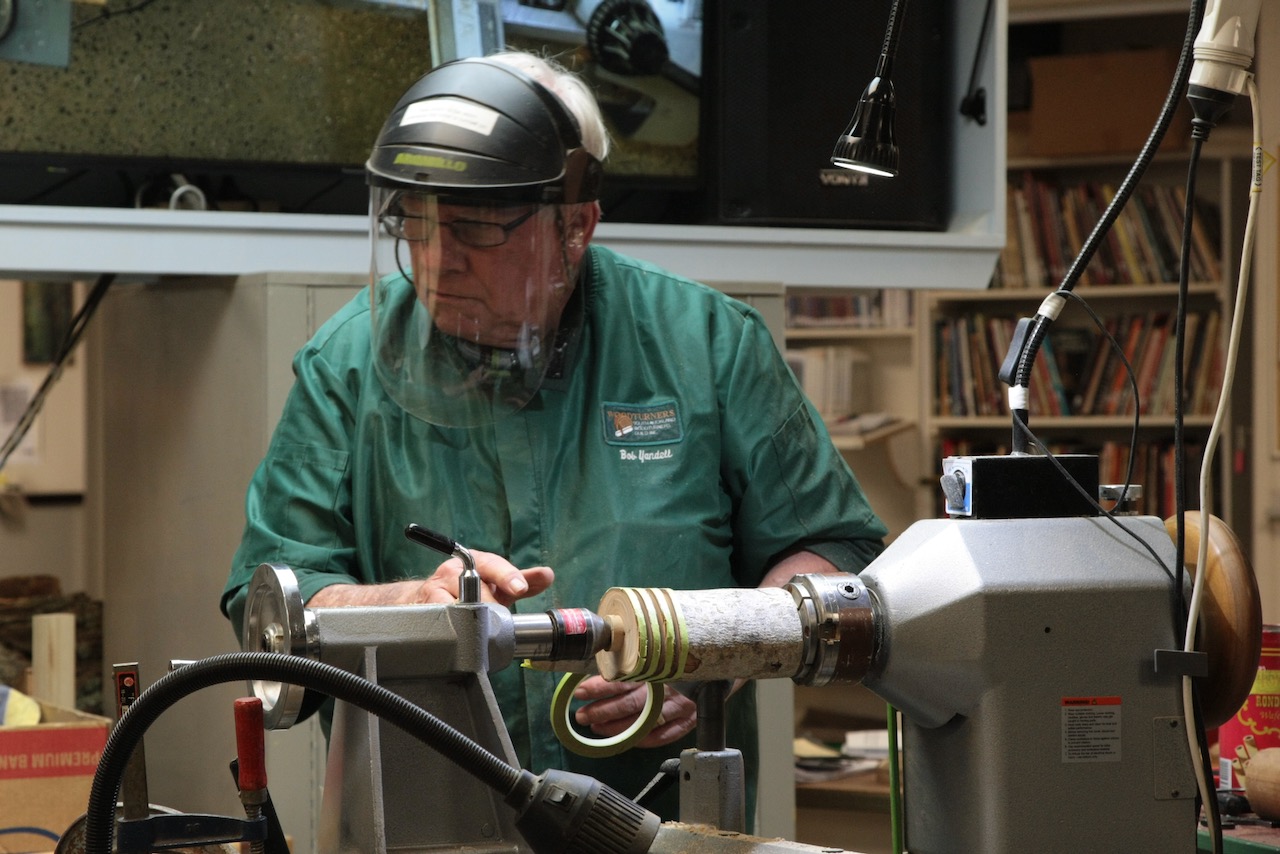
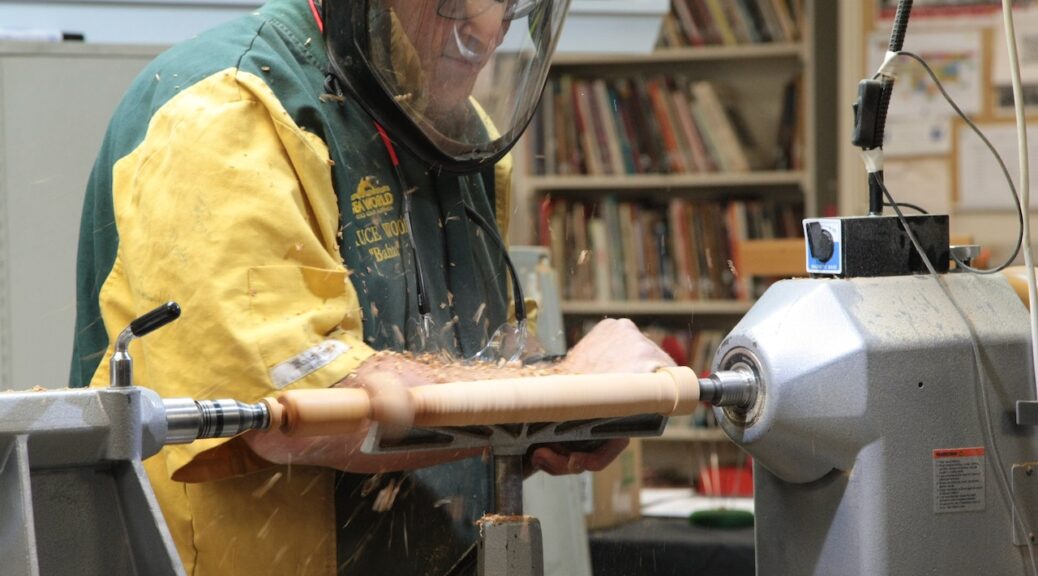
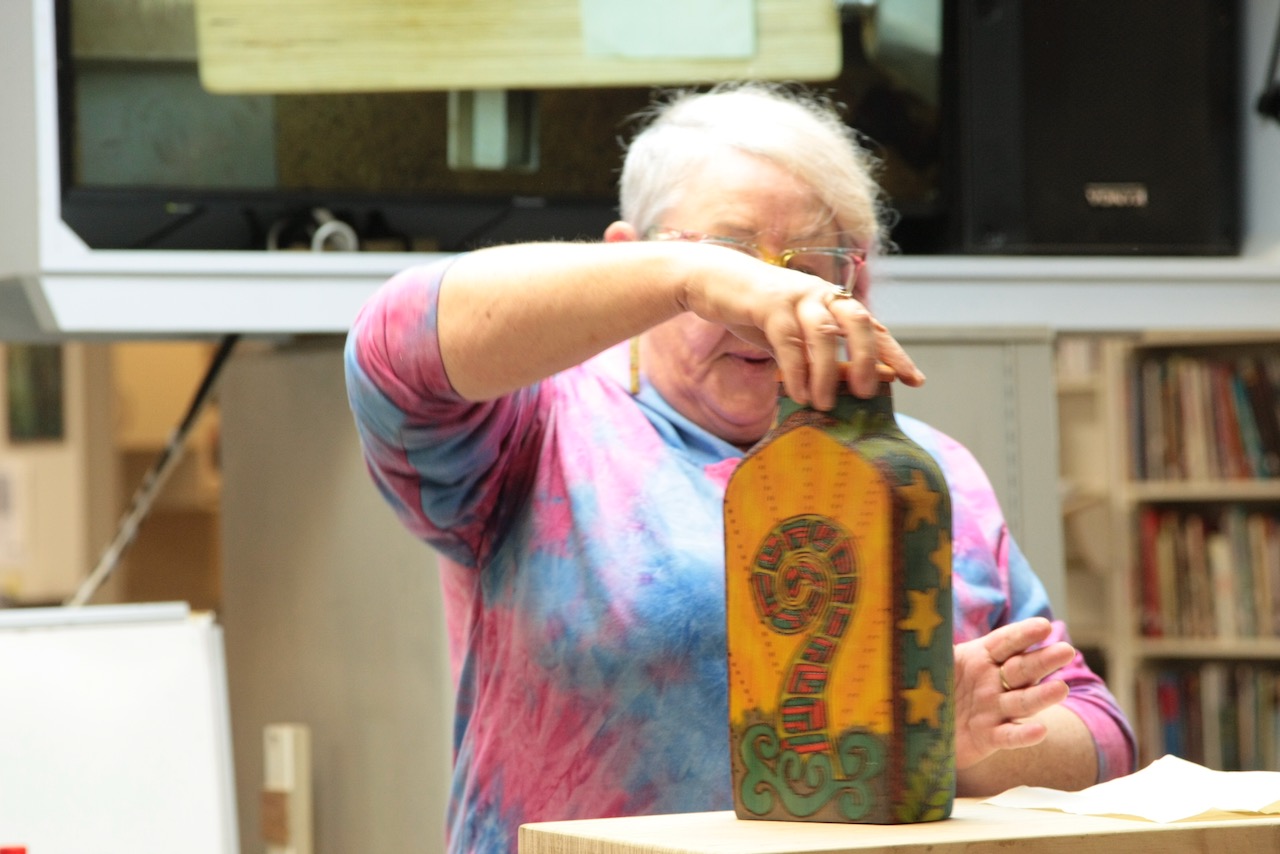
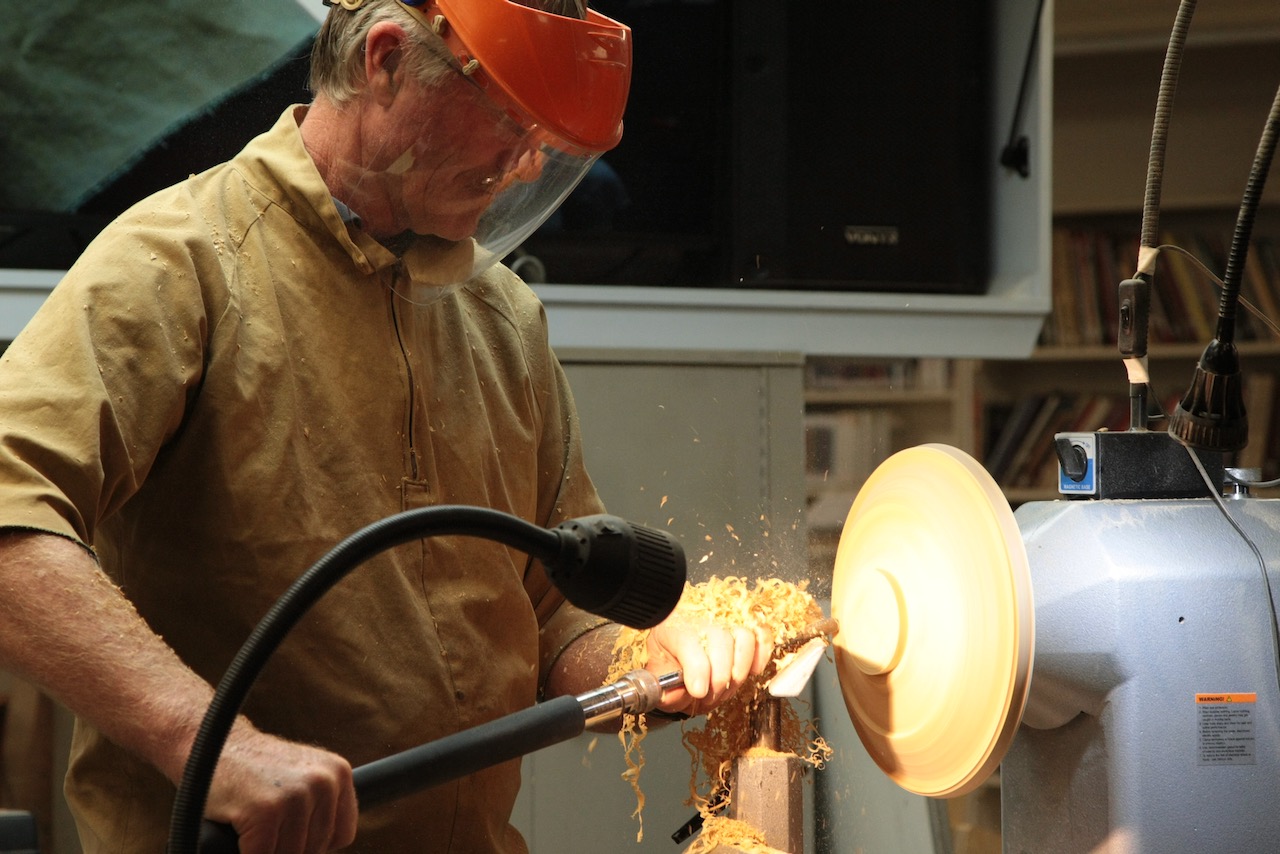
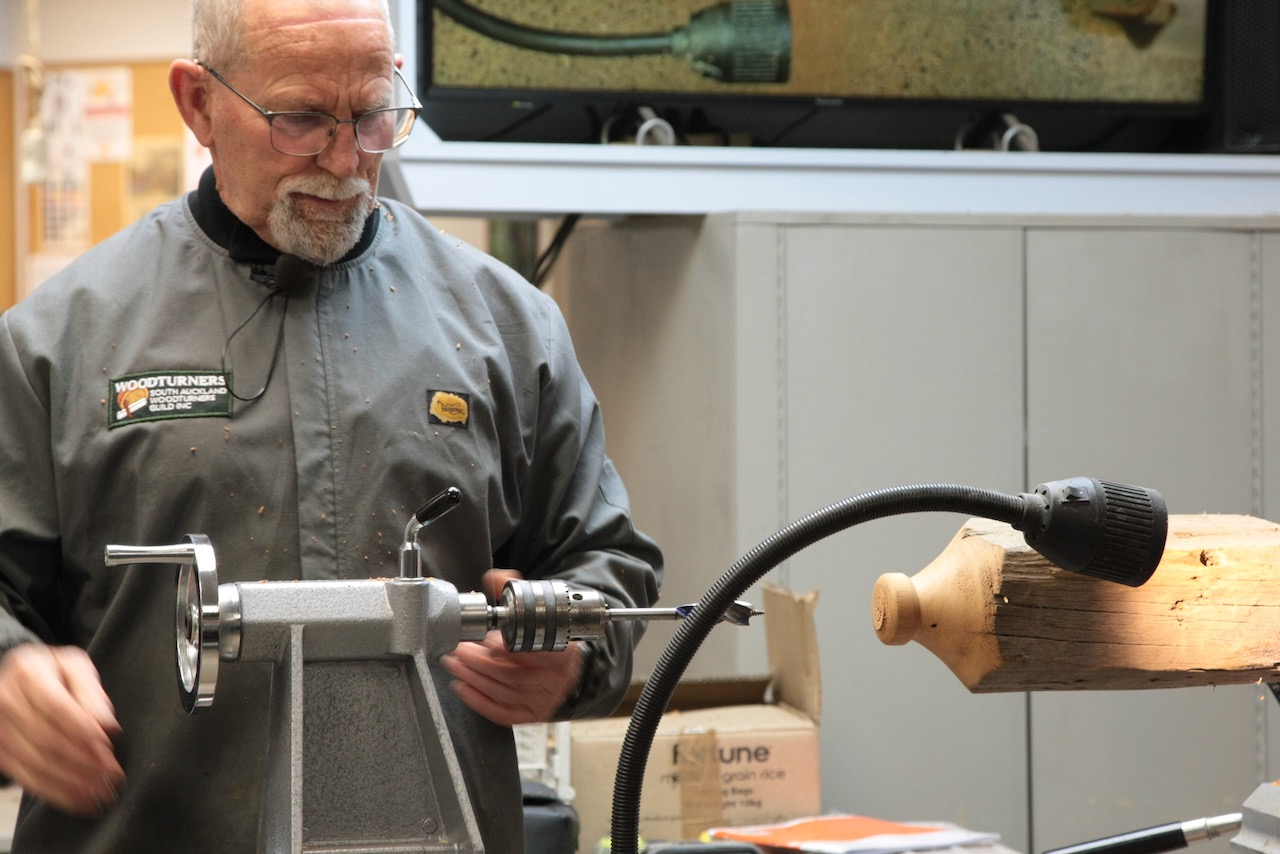
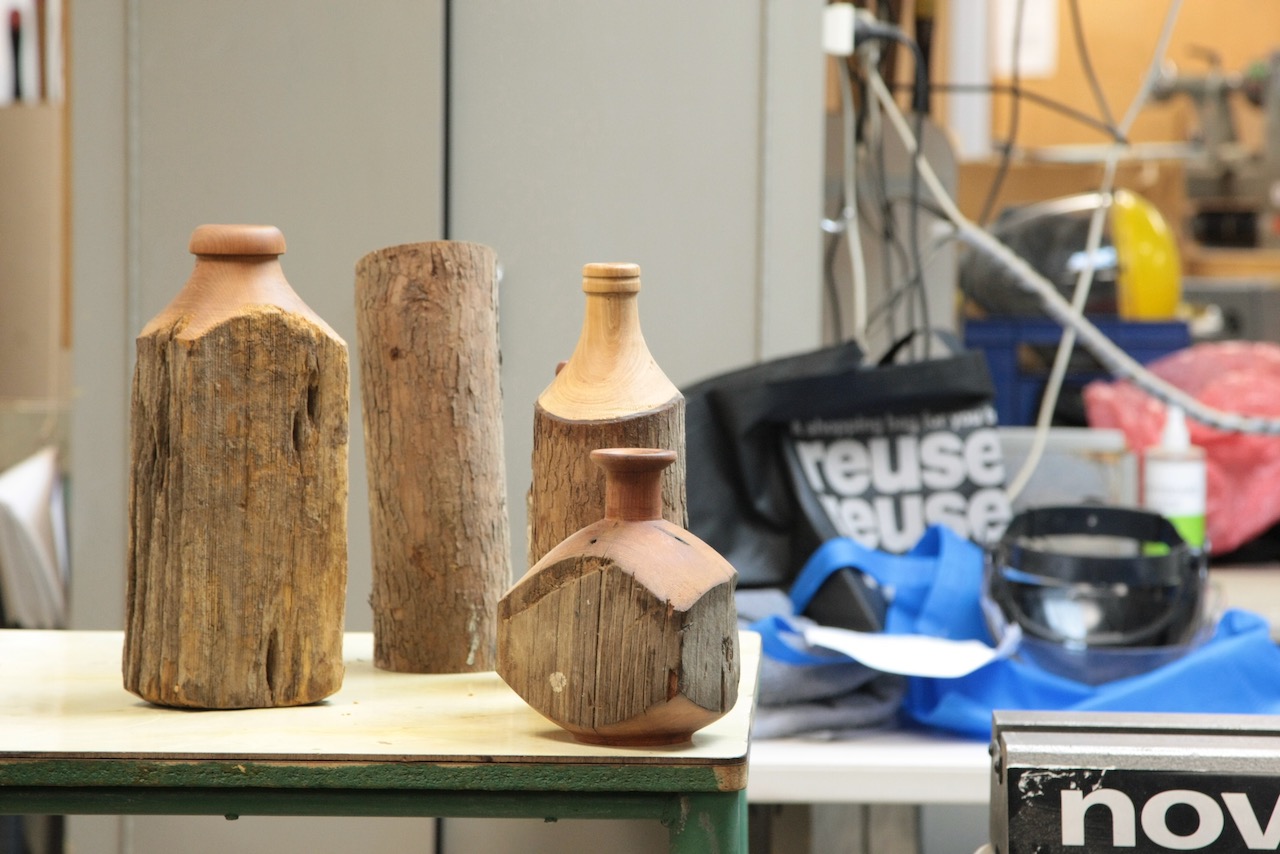
In keeping with the theme for the term of “natural”, Garry chose to demonstrate a simple but aesthetically pleasing subject of bottles, which he advised look cool in a set, and which are great as a gift, or a good seller at the markets etc. The thing about Garry’s bottles is that they are made from old posts – totara, puriri, whatever, or from a tree branch, and then turned to retain most of their original shape and patina.

Making bottles is a good way to use cracked or damaged wood for purposes other than firewood. With a hole drilled through the top they can be used for dry flower arrangements, or with a glass tube inserted, as a conventional vase. Timberly, or a florist, can supply the glass tubes.

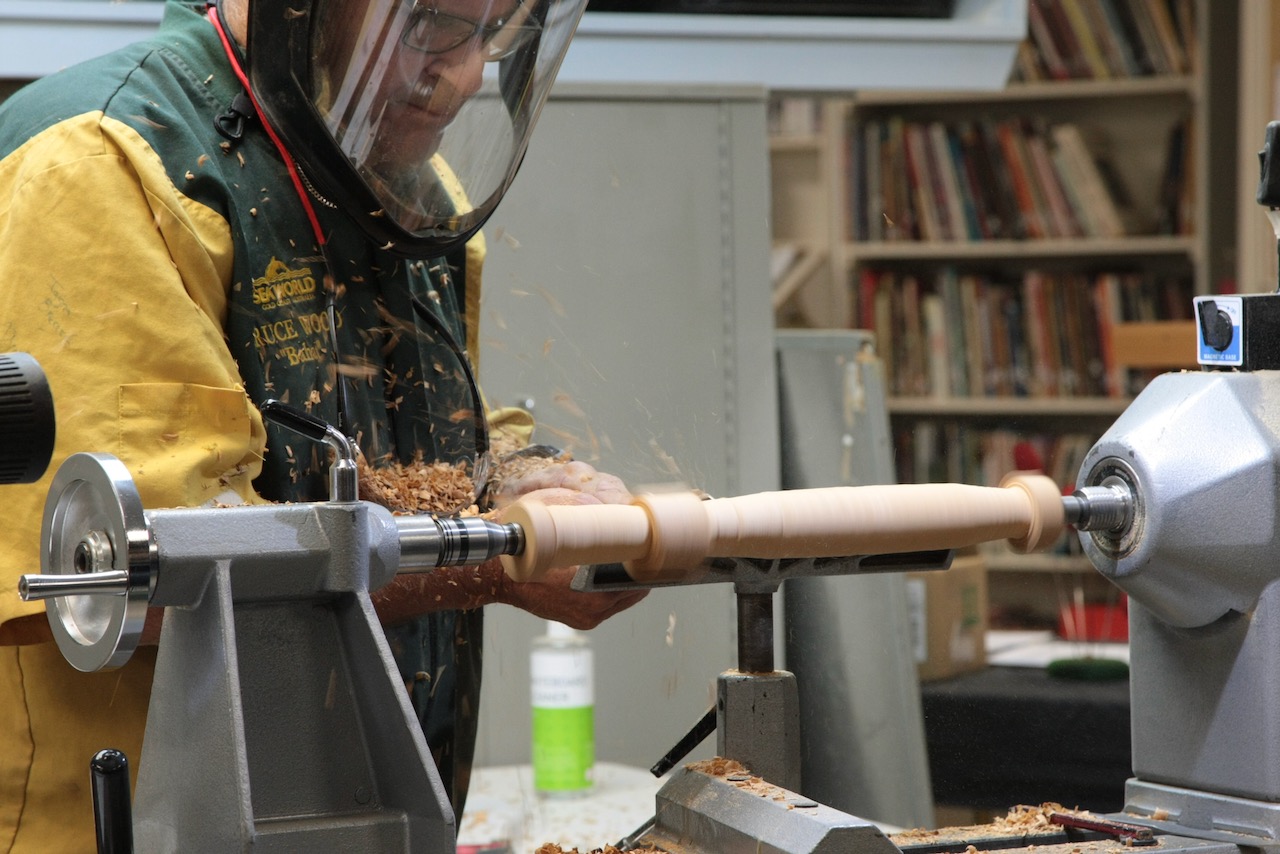
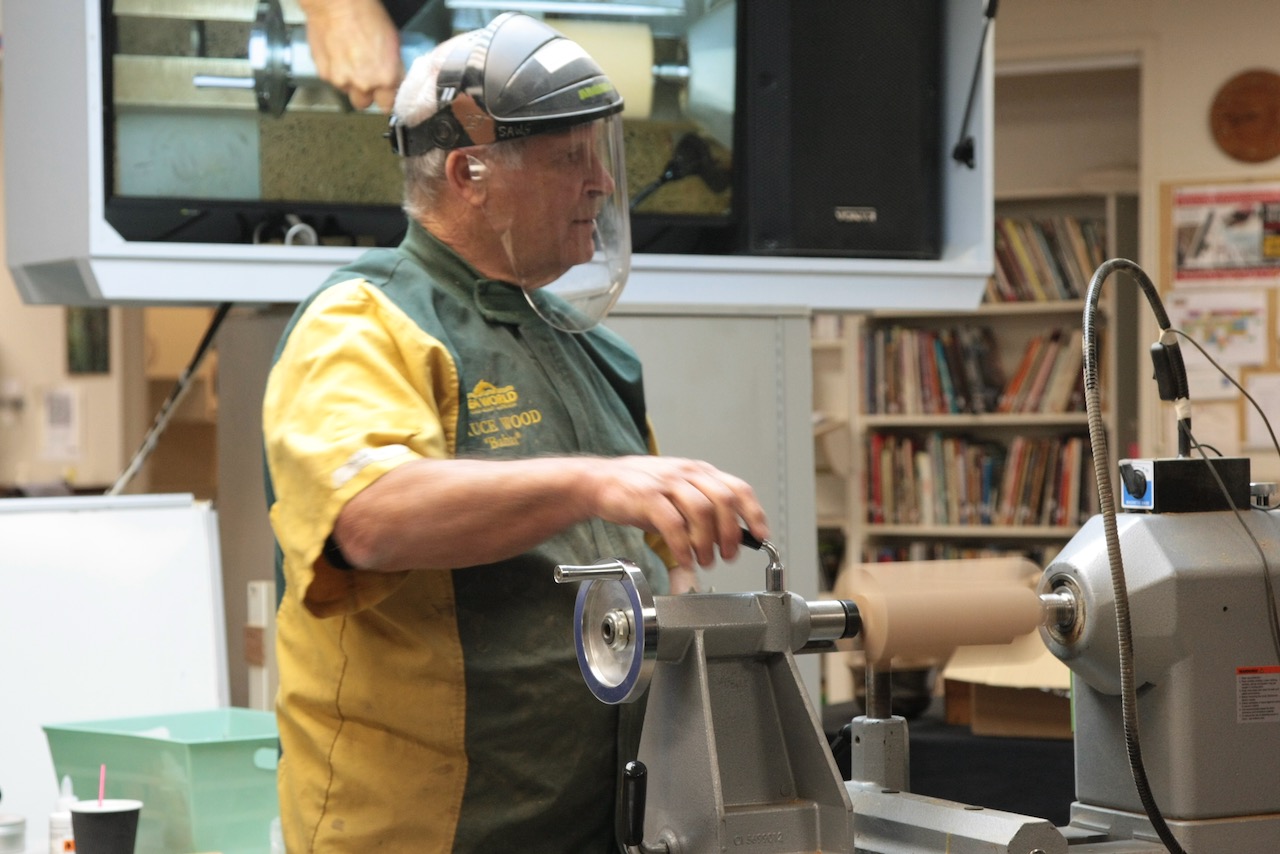
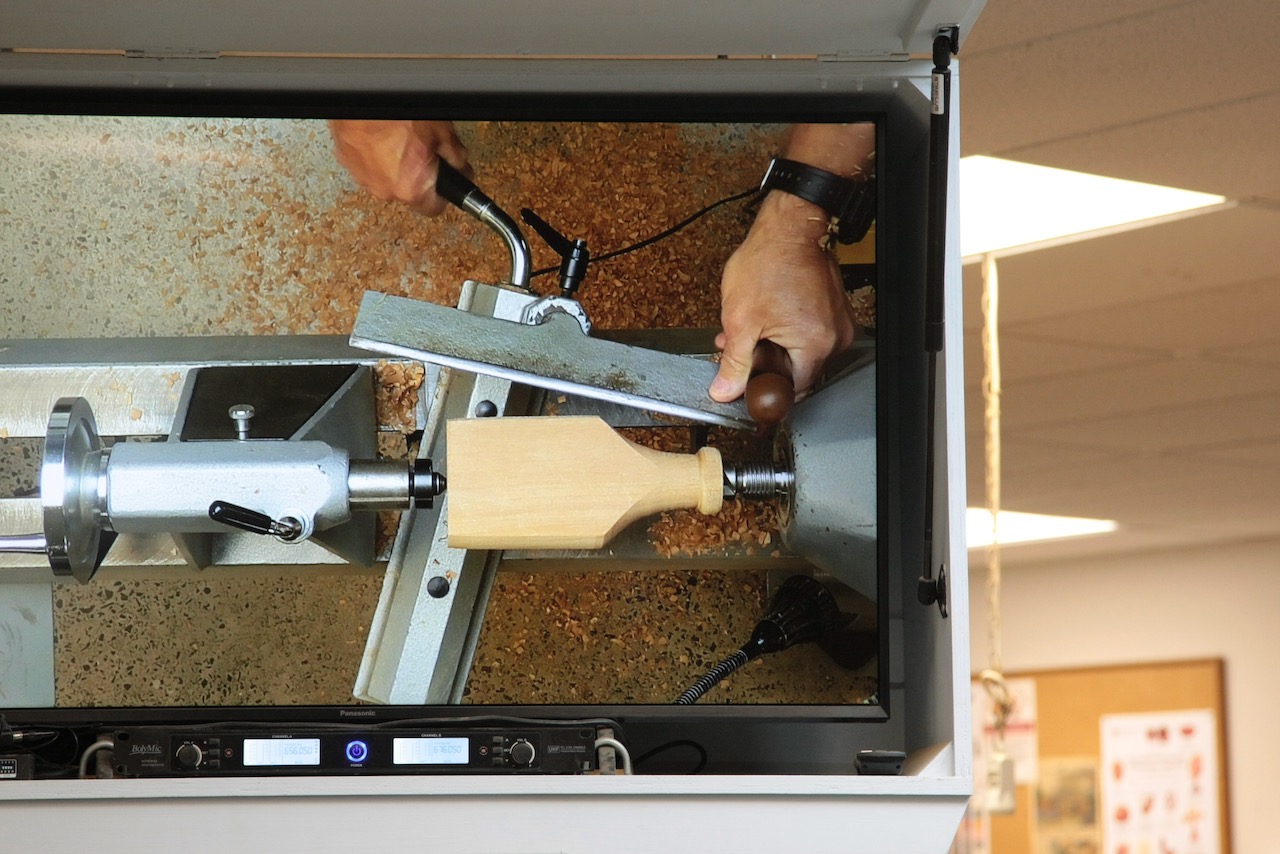
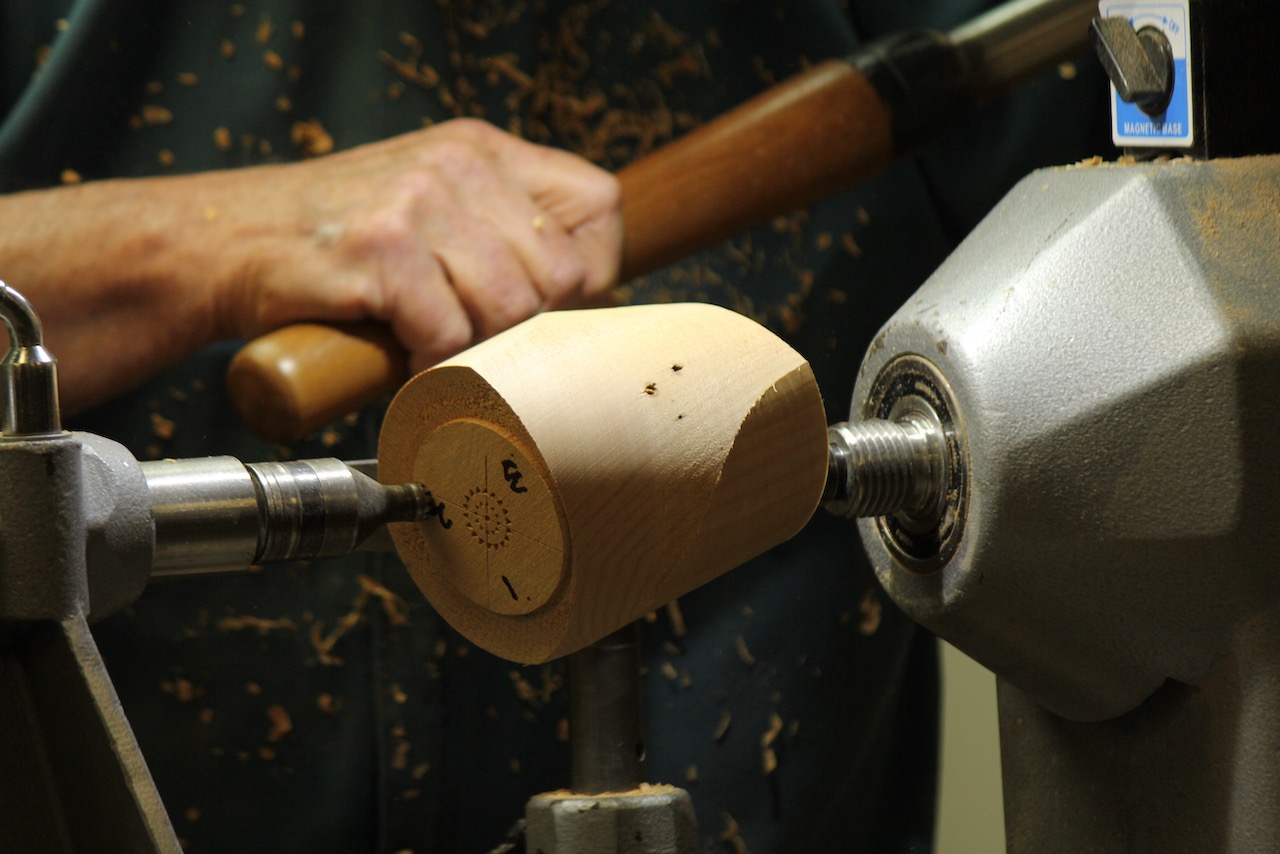
With the post shortened to an appropriate length, find an approximate centre at each end. Dead centre is not important because the look is natural and the shape of the post is irregular anyway. Mount between centres and turn a spigot at one end. At the other end commence to shape the neck and top of your bottle. Decide what form you want the neck to be – short or long, fat or thin etc. Bottles look best in a set, and even better in groups of odd numbers, with each bottle having different characteristics – height, shape, neck etc. Garry likened this to having rocks in a garden – two rocks looks like two rocks, three rocks looks like landscaping.

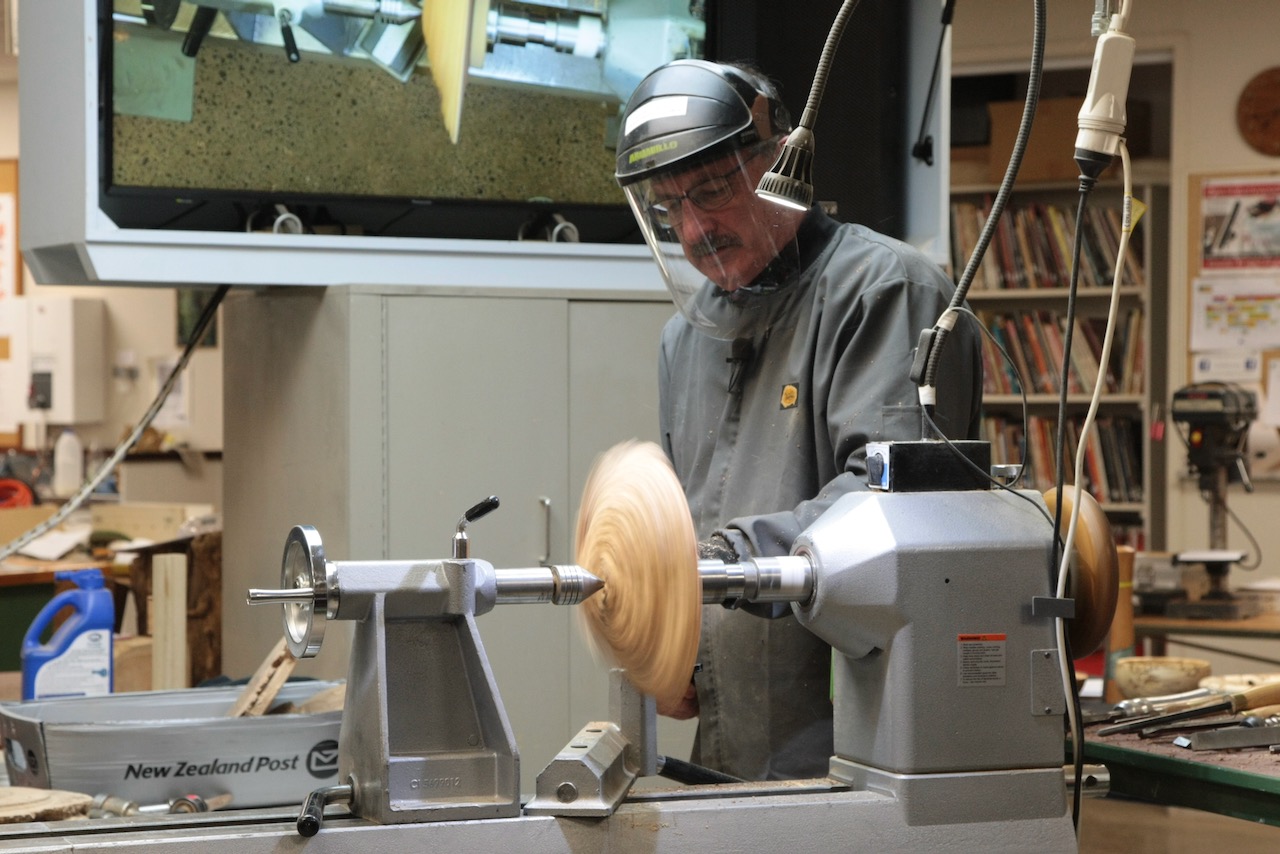
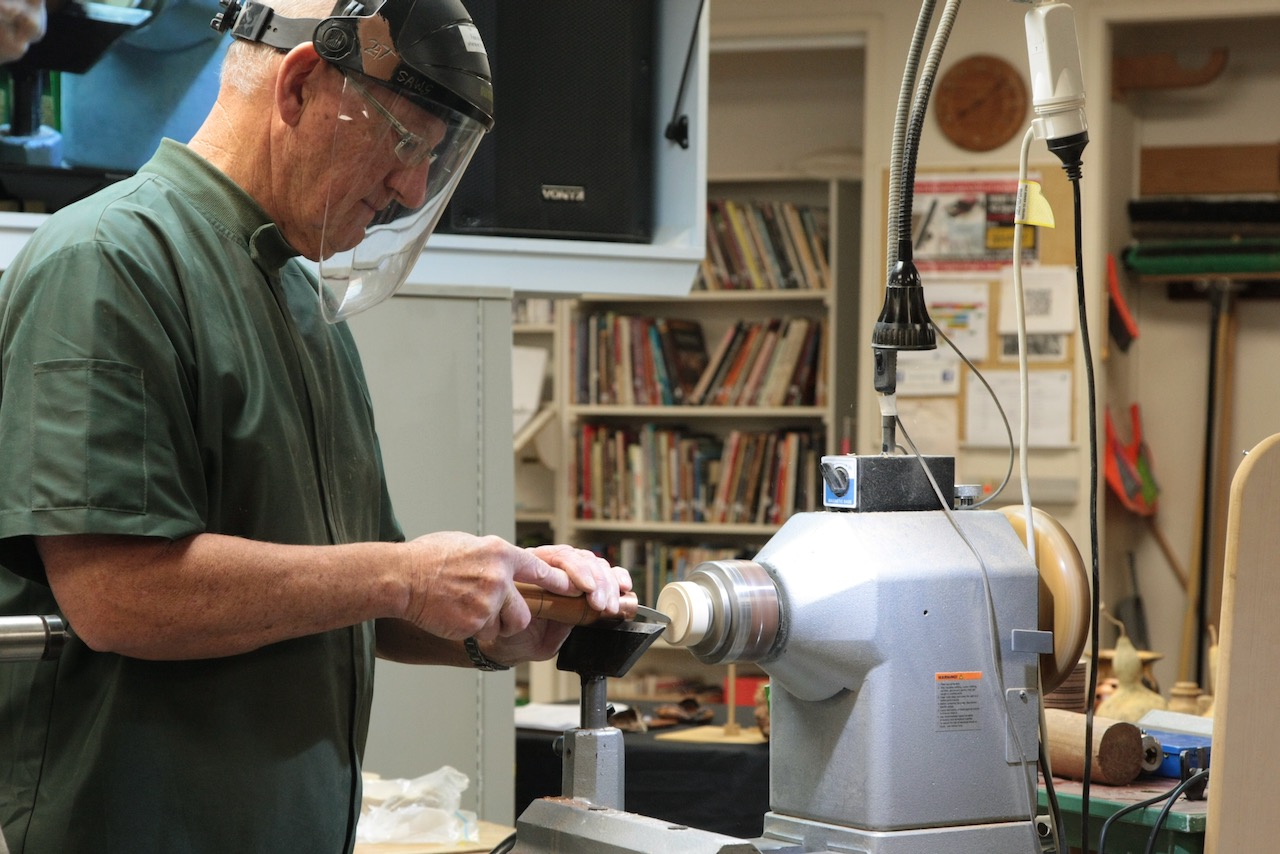
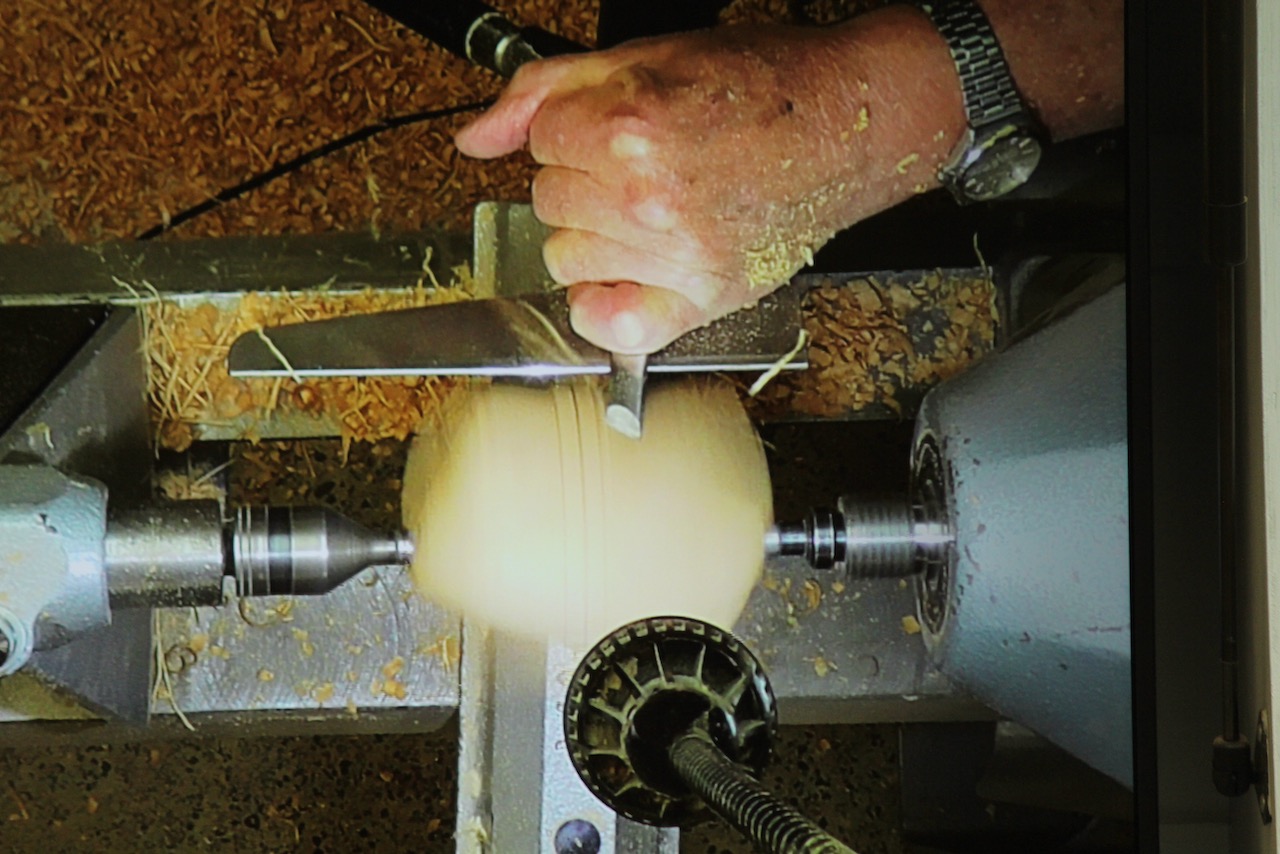
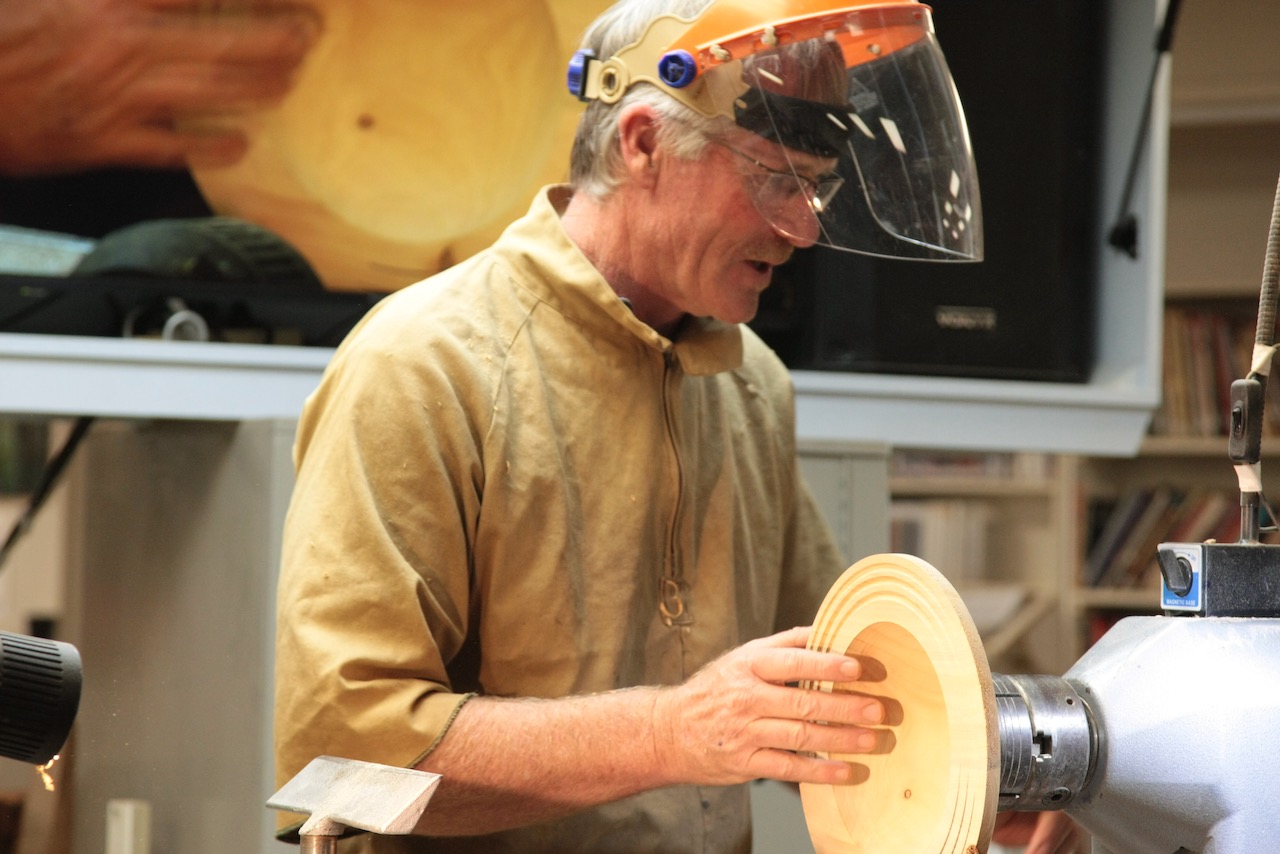
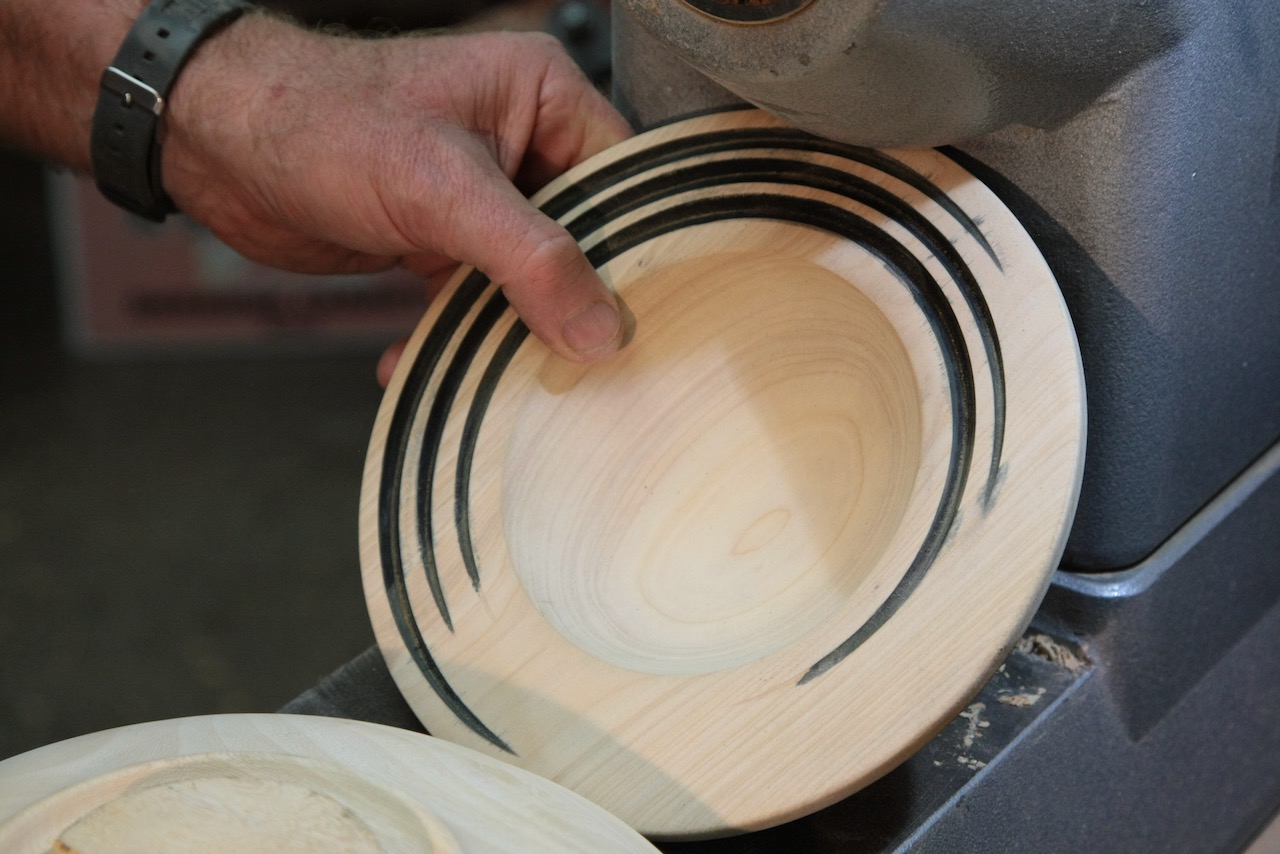
Complete turning the neck to the design of your choosing. Remember to leave enough wood for the hole you will drill. Give it a quick sand if needed. You can get ideas from old bottles for different shapes. Next give a little bit of shape to the bottom of the bottle. Garry prefers to create a slight concave so the bottle sits nicely. Make sure to leave a shoulder for the chuck jaws to sit against.

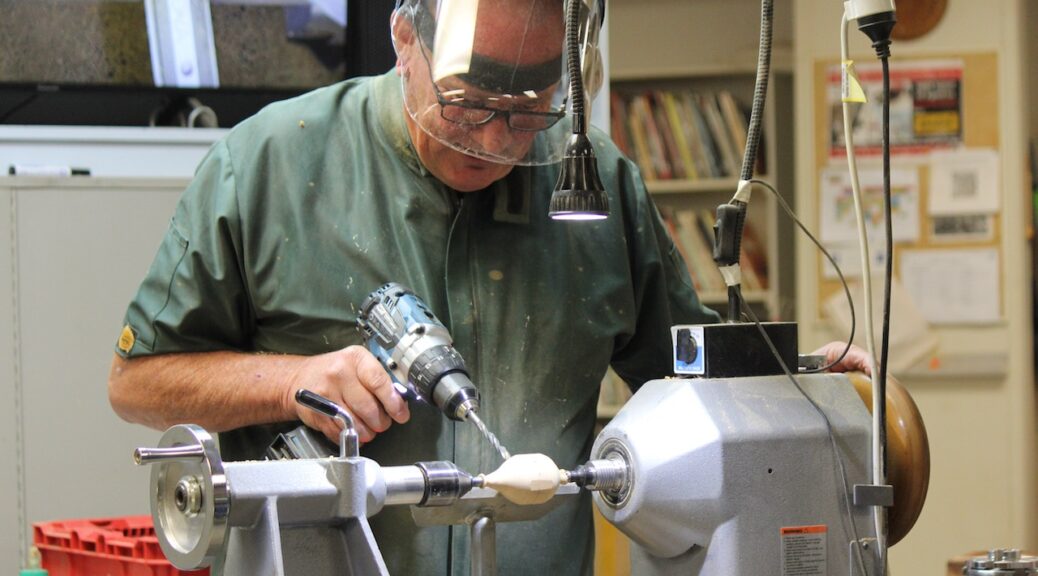
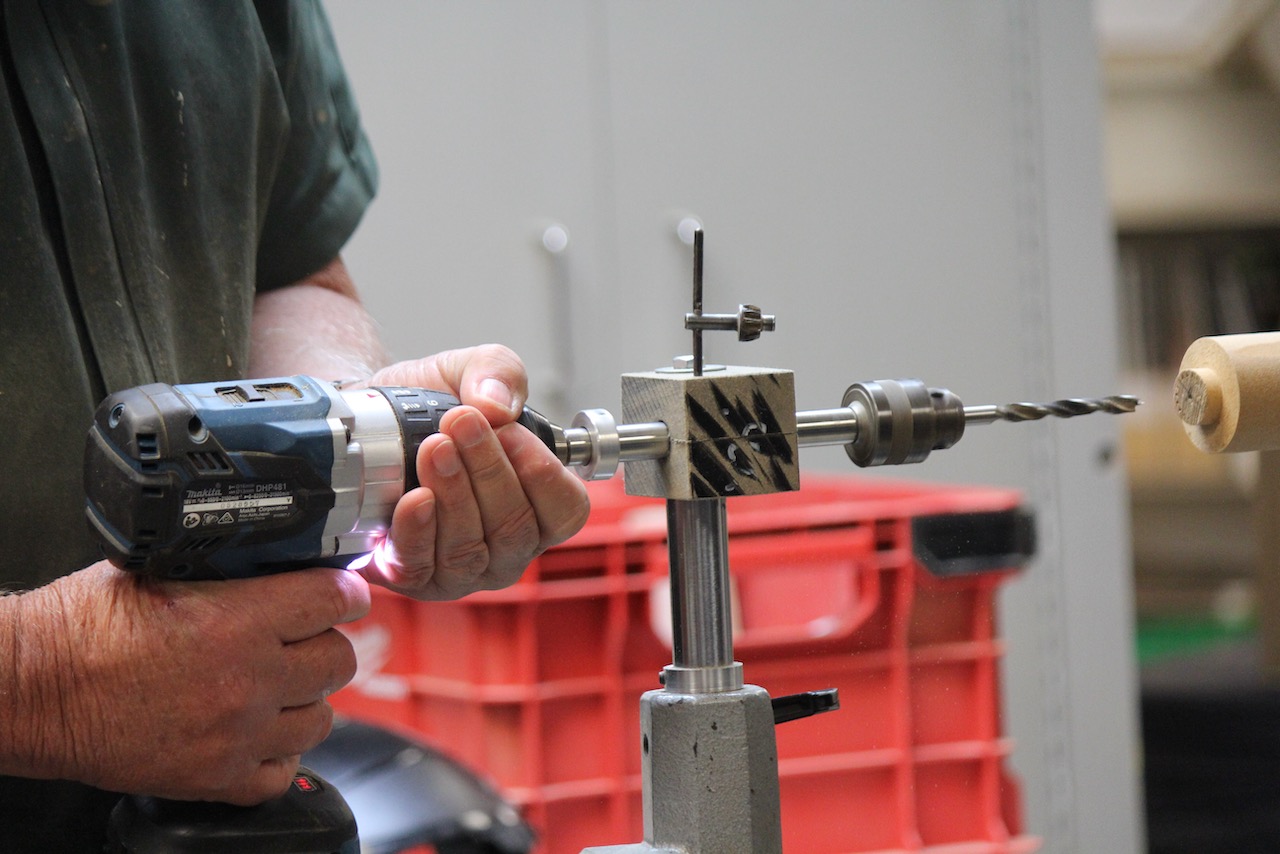
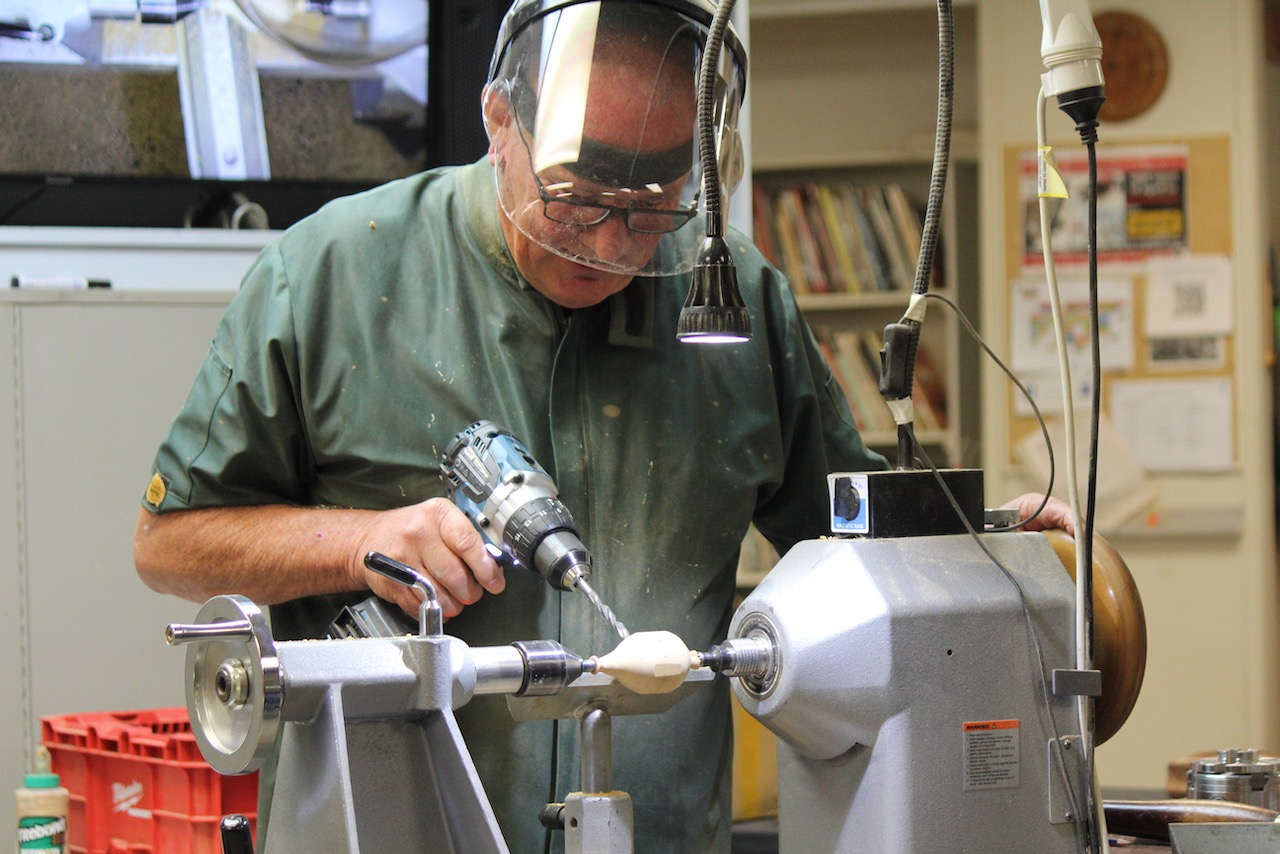
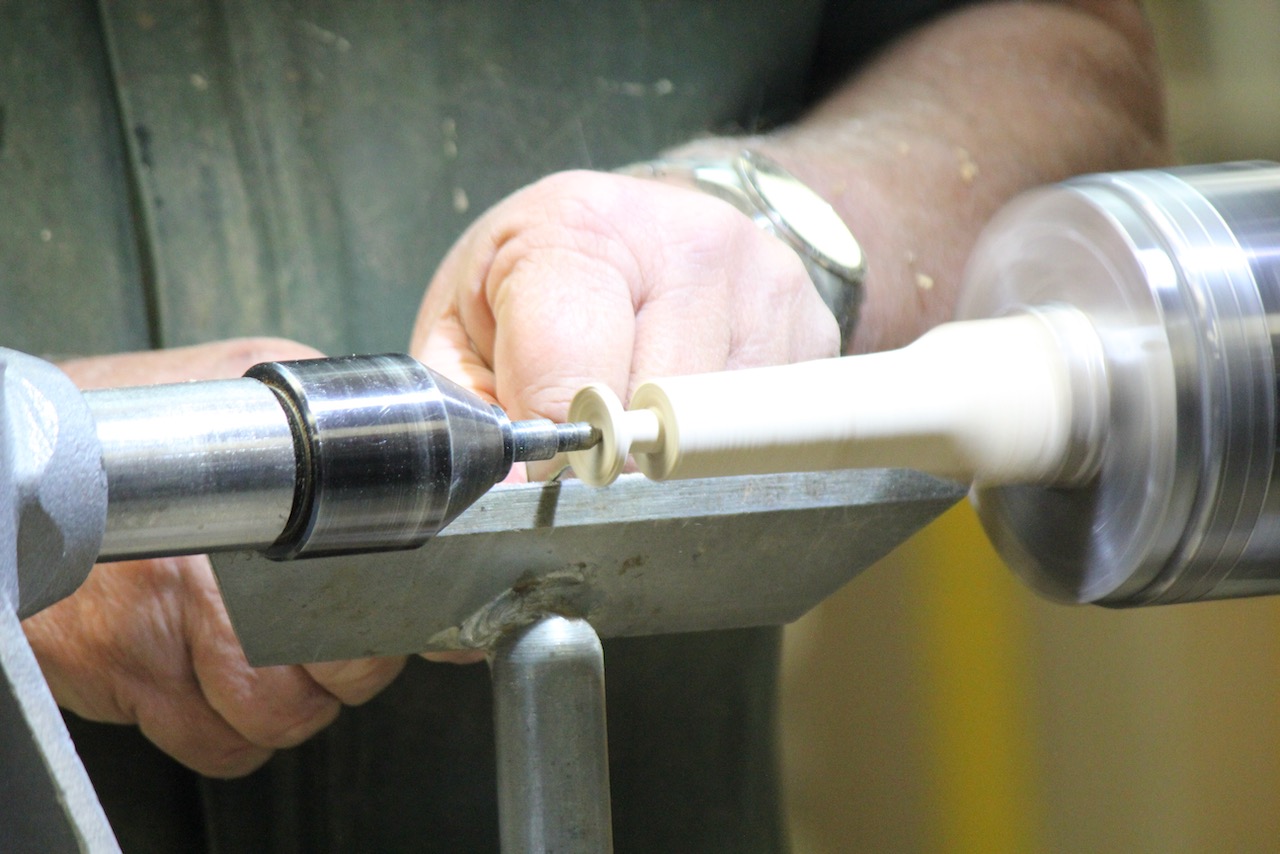
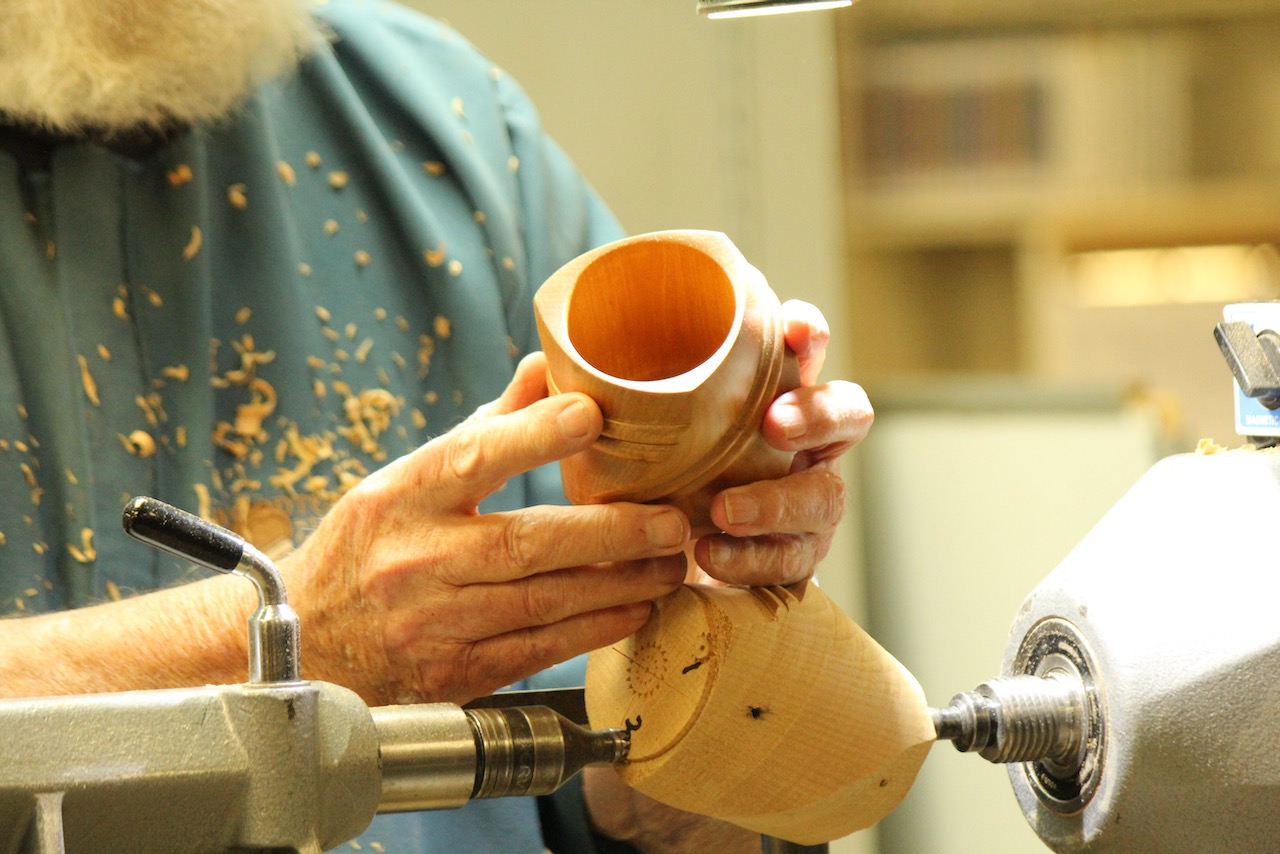
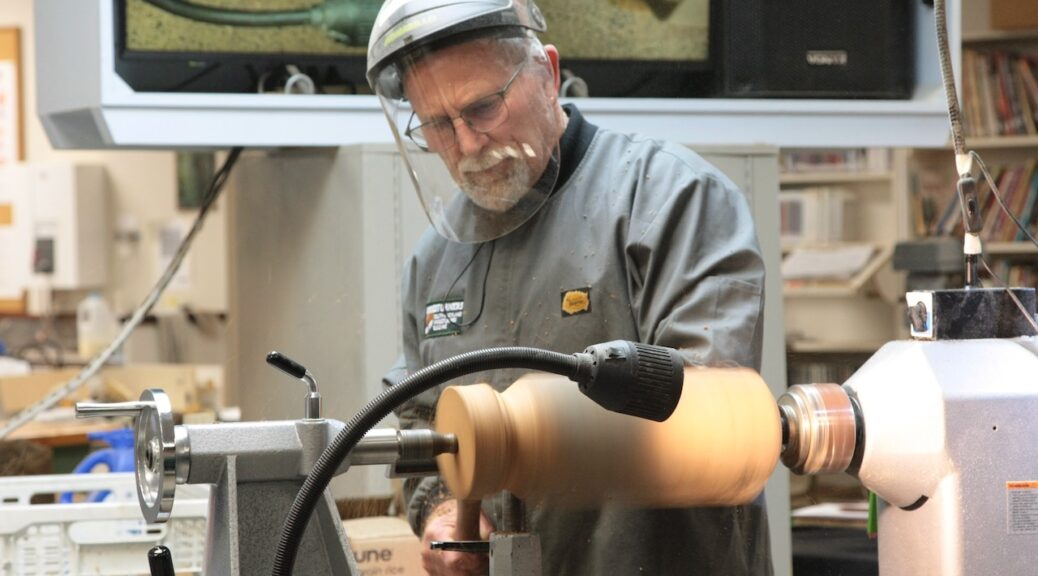
To complete the turned piece, grab the spigot in the chuck. Line it up on centre using the live centre in the tailstock. Tighten the jaws. Turn the lathe speed down to around 500, and with a 20mm drill in the Jacobs chuck, drill your centre hole. If necessary, tidy up the entry point of the drill with your chisel or with sandpaper.

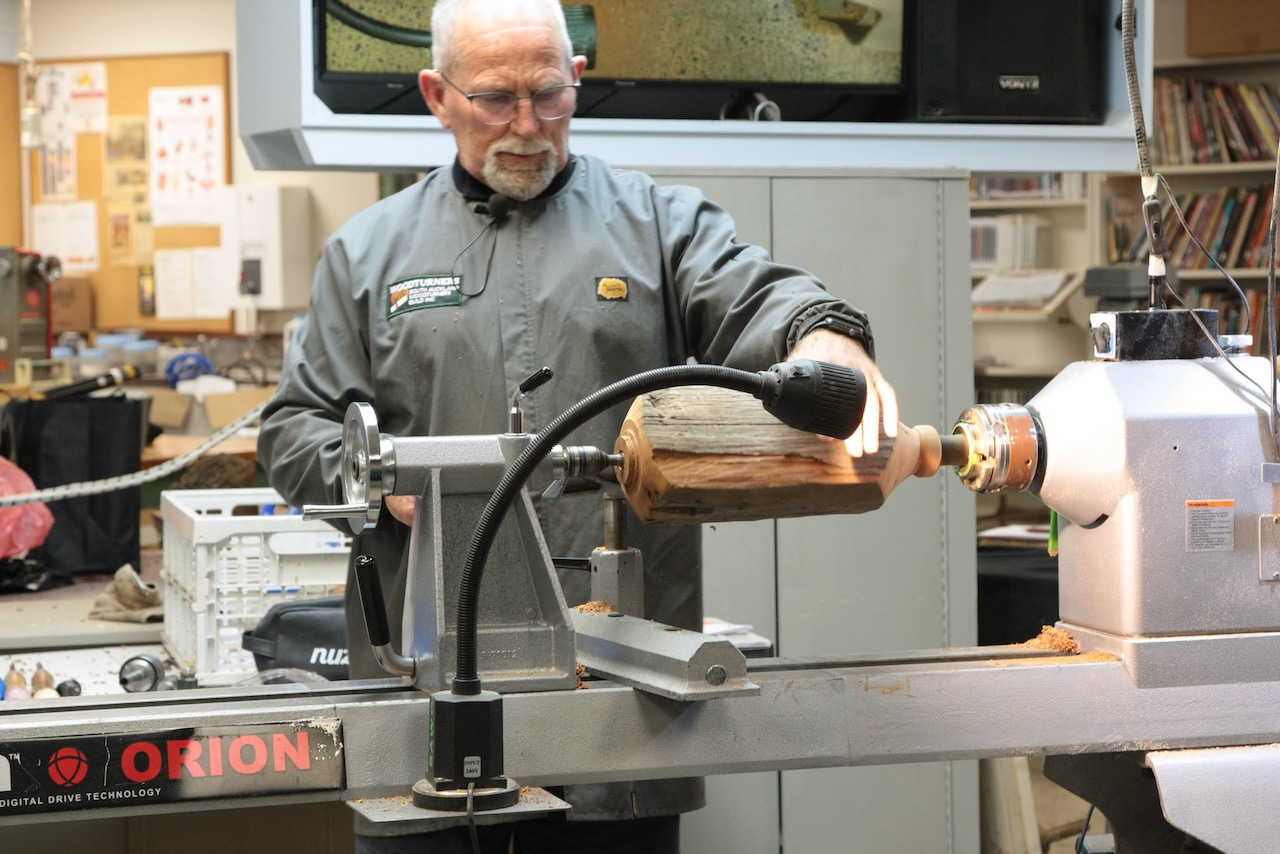
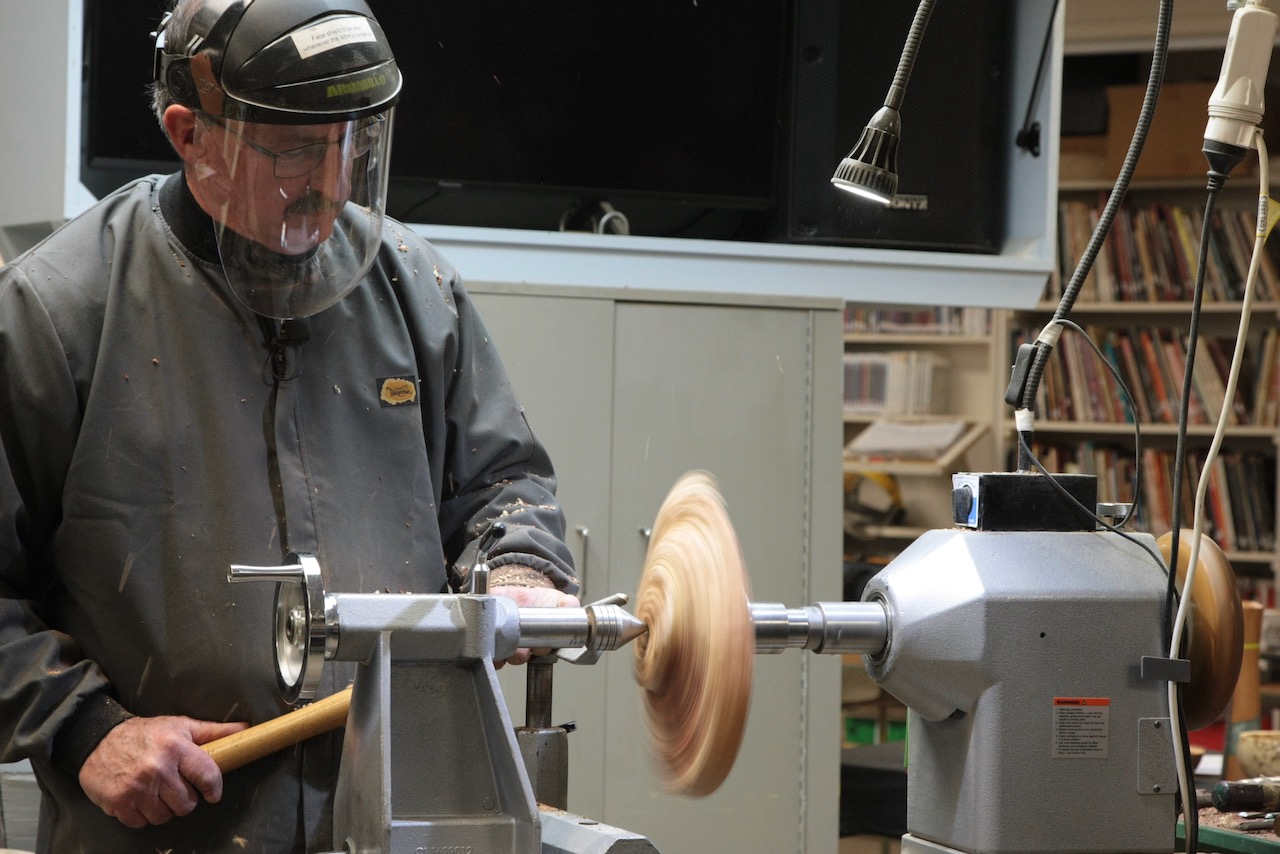
To remove the tenon, Garry used a home made mandrel which mounted in the chuck and fitted neatly into the newly drilled hole in the neck of his bottle. With the tailstock up, he nibbled away the tenon until just the nub was left around the point of the live centre, and once off the lathe this was removed with a chisel. A final sand to the bottom, and a bit of wax or oil to finish, and hey presto you’re done.

One trick that I hadn’t heard before – if your wood chips (which totara is very prone to do), and the chipped area looks new against the weathered look of the rest of the wood, give it some fast aging by soaking it in yoghurt or stale milk.

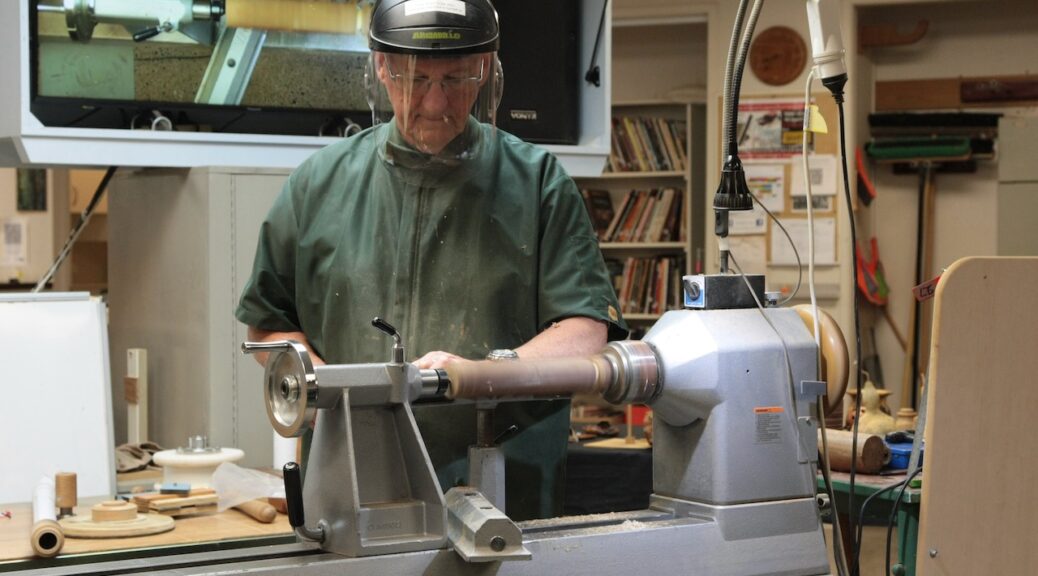
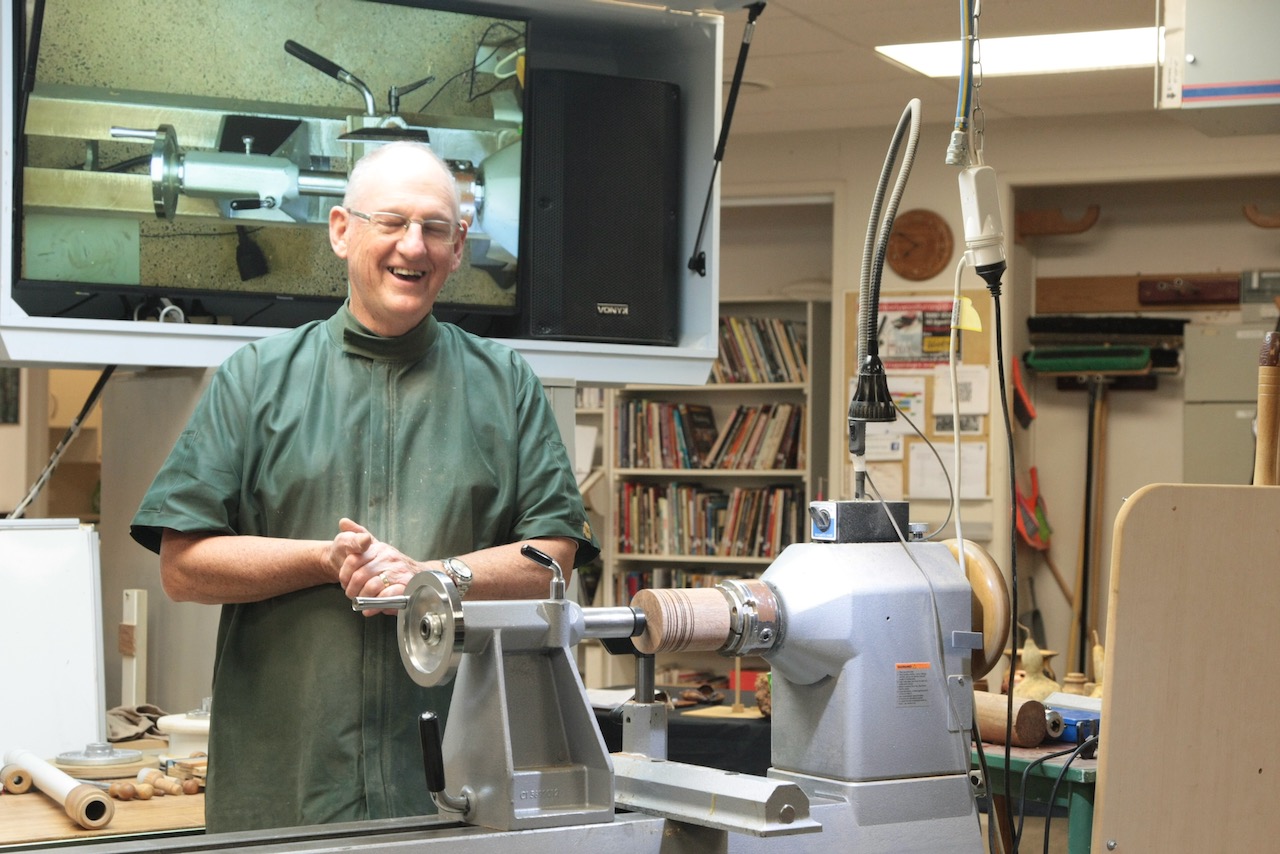
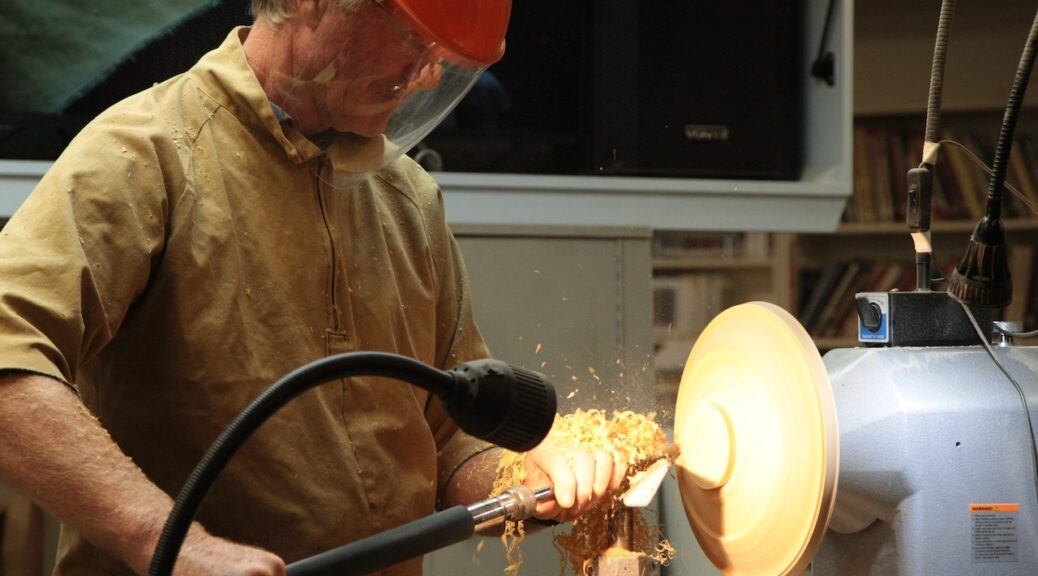
Thanks for the demo Garry, and for showing us that wood art doesn’t need to be technically complex to be highly effective.

Terry Scott – Turning Burls

Club Meeting: 3 August 2022
Report by: Kieran FitzGerald

About 10 years ago Terry purchased a large load of Australian burls, and many of his signature pieces have been turned from these burls. Terry commenced his demo tonight by showing us a range of completed and partially finished burls which he was still turning. The unfinished pieces comprise a stock of canvases for him to apply his finishing skills to, including carving.

Preparing for a demo can be time consuming and Terry spent a fair while turning and putting together the tools and materials needed for tonight’s demo. However even the best don’t get it right every time, and Terry managed to forget at least two finished pieces and a chuck with the correct size jaws to hold pieces that he was meant to use in the demonstration. However, despite these small setbacks the show went on without a noticeable hiccup.

A noteworthy aspect of Terry’s presentation was the quality of his commentary. Throughout the demonstration Terry peppered his audience with useful tips and advice to both entertain and inform turners of all skill levels.

The prime piece of advice Terry gifted to us tonight was to use a support ring when turning a potentially fragile rim or winged area on a bowl or platter. Hopefully our photographer captured a good photo of this which will be the easiest way to demonstrate the support ring in use. Terry explained that many of his burls are too shallow to be considered useful for a traditionally shaped bowl, but can still be turned into a “bowl which is not a bowl”, at the same time displaying all the inherent beauty of the burl.

The wood Terry chose to turn for tonight’s demo was a shallowish coolibah burl. Coolibah is a eucalyptus and is one of the hardest woods in the world. Typically it is an irregular shape, and Terry mounted it with a screw faceplate on the flat side and the knobby and knurly bits facing the tailstock. His first tip was that before bringing up the tailstock he will turn a flat for the live centre to sit against. The purpose of this, he explained, is so that the live centre is accurately centrally positioned rather than perhaps pulling slightly off centre. Throughout the turning process maintaining true centre is important especially because a tiny degree of off-centredness (a new word, add it to the OED) can cause a very noticeable variation at the perimeter, especially with a narrow rimmed bowl.

The first operation is to face off the area which will form the upper side of what will be the winged area of the bowl. Terry shared several hints as he commenced cutting:

Bring your visor down before turning on the lathe
Many catches occur after finishing a cut, so don’t look away until you have safely withdrawn the tool
Due to the non-round shape of the burl there is a lot of air, so turn the lathe speed up to increase the amount of tool contact
If you have suitable extensions use these to create turning room between the piece being turned, and the headstock and tailstock
Finish with a skew, using it as a scraper, to create a smooth finish. Terry explained the properties of a negative raked scraper versus a traditional scraper and how it reduces the likelihood of a catch.

On the tailstock end Terry cut a spigot before commencing to shape the underside of the bowl. He continued to create the thin underside of the wings, with the lathe spinning at around 800rpm at this stage. Terry was using a draw cut, stopping the cut when he reached air. The nature of the burl wood is that it is extremely hard, and as it does not follow any grain pattern, it comes off the chisel in chips. The commentary was ongoing as Terry turned. Listening to the wood and noting the sound variations gives good clues to aid the cutting process. Terry applies the heel of the gouge to the wood, listens for the tap tap tap, and gently lifts the tool to begin the cut. You could hear the hardness of the wood. A scraper is used to bring the finished shape of the underside to a point where minimal sanding is required.

When the underside is finished the piece is reverse chucked and turned. At this point the support ring can be hot glued on to the underside of the bowl, typically directly under the rim, or near to the top of the bowl. The support ring gives much stability to the piece being turned, reducing vibrations and preventing the movement which occurs in the wood as tension is released in the wood due to the fibres being turned away. If the glue begins to dry before you have finished applying it completely around the ring, give it a burst with the hot air gun to soften it again. Terry advised that sometimes with a larger bowl he will use two support rings. In the same manner as the ring provides support in a bowl, he also uses struts with some of his winged vessels.

The next step is to turn the inside of the bowl. Starting with the wings, and finishing as you go, work towards the centre of the bowl, about 10mm at a time. Maintaining a continuous flow, and cutting a small bead to mark the point where the wings dive into the bowl creates an impression that the bowl is larger and deeper than it actually is. Measuring with calipers, Terry cut down to an even 5mm thickness. He pointed out that he prefers to use a spigot over a recess because it is easier to get a measurement of the bottom thickness. The tailstock was kept in place for as long as possible while the central core was cut away, and Terry cut downwards rather than crossways, still rubbing the bevel, so the pressure was against the headstock. Finishing cuts to get a regular curve were with a 55 degree bottoming chisel and a scraper, then checked with a profile gauge and a glue stick to ensure a perfectly smooth curve. With the scraper, pivot the tool rather than dragging it across the tool rest, to get a flowing curve. Sand with the lathe stopped so as not to round over the edges of the wings.

The final step is to carve three feet on the bottom to give lift to the bowl. Using dividers, mark out opposite points across the longest diameter of the bowl, and then opposite points across the shortest diameter. Position two of the feet on the longest diameter, and the remaining foot on one of the shortest diameters. Carve the feet taking care to blend the bottom so the line of the bowl flows through.

Terry showed us a partially turned burl which had a naturally occurring void in it. He advised that it is possible to use the turned chips and superglue to invisibly fill the void. Sometimes it may be necessary to add strength to the void by inserting panel pins to make a cage to hold the repair. Instead of using wood chips, turquoise or copper could also be used. However as a word of caution, if a piece is being added to a collection it must not have superglue in it. Over time, superglue can deteriorate, so collectors will not buy such pieces.

Conversationally, Terry advised that buyers always seem to want to know how long a piece takes to make. His reply is 34 years. He says it is irrelevant how long it takes to make, because time can never be recovered. When he bought the burls ten years ago they cost about $140 each, but they would be worth double that now. Pieces like those being demonstrated tonight might have a selling price of $1200 to $1800. When you look at the beauty of each piece of wood, the quality of craftsmanship that goes into making them, and the sheer beauty of the artistry, you can see they are worth every penny. Thank you Terry.

Bob Yandell – Hidden Within

Club Meeting: 27 July 2022
Report by: Kieran FitzGerald

The theme for this term is “Natural”, and this meeting marked the first club night for the term. Accordingly, Bob chose a naturally themed item to turn for the enjoyment of members.

Bob encouraged members to turn to nature as an inspiration for woodturned art.

A seed pod from an unknown tree triggered his idea to turn a piece in which the original shape of the blank is retained in its natural form, but the piece is turned in such a way that the form of the object is silhouetted within the piece.

Before picking up a chisel, Bob used a profile gauge to outline the shape of his hidden object, in this case a bud vase, and transferred it to graph paper. From here he was able to translate the dimensions to suit his blank piece of wood. The wood he chose was a branch (possibly camellia?) about 200mm long and 90mm diameter. To simplify his turning, Bob transcribed the depth measurement of his cuts on to a length of masking tape which he stuck to the tool rest.

Bob had pre-turned the spigot on his blank, and he fitted it in the chuck. With an engineer’s twist drill (one with a morse taper which eliminated the need to use a Jacobs chuck), he commenced to drill a 20mm (approx.) hole into the centre of his blank.

Starting at the tailstock end (the top of the vase), and using only a parting tool, Bob made a cut to the depth of his first measurement. Next he took a narrow strip of masking tape (approx. 6mm) and wound it around the blank beneath his first cut. This it to delineate where he will make his next cut. Then he made his second cut to the next measurement on the masking tape on the tool rest. More masking tape, another cut to the next measurement, more masking tape, next cut, and so on, until the shape of the hidden vase is fully profiled within the length of the branch. Initially Bob checked the depth of his cut with calipers, but as the form of his piece took shape he was able to eyeball the depth of the cuts. Each cut was refined so that rather than having a square edge it was angled towards the next cut to create a continuous line.

To make the outline of the bud vase stand out more within the natural form of the blank timber, Bob took a small paintbrush and with a dark coloured acrylic paint he coloured the interior face of each of his cuts. To flash it up from a weed pot to a bud vase a glass tube can be inserted in the drilled centre hole.

The demonstration was a lively affair with considerable audience participation, and our thanks go out to Bob for kicking the term off with such an entertaining demo.

Bryan Mawhinney – Emoji Toys

Club Meeting: 22 June 2022
Report: by Kevin De Freitas

Bryan started with a history lesson of when the club approached the council to take on the club rooms. When asked what the club would do for the community, Wig Stands and Toys were to be made and he encouraged members to get making.

The origins of this toy start with Bryan wondering what to do with the offcut corners from bowl blanks so size is not specific. (However, the piece used in the demo was approximately 55mm diameter and 90mm long.)

The intent is to make a teardrop shaped figurine featured with hair, eyes, nose, ears and feet. Bryan handed around a collection he had previously made. He recommends making these in batches to save time.

Bryan mounted a chuck with 25mm pin jaws.

The blank was already turned round with a spigot on each end.

The upper (head end) spigot is small to accommodate a single hole for the hair.

The lower (feet end) spigot is larger to accommodate two holes for the feet.

Drilling holes for Hair and Feet – Bryan mounted the blank in the chuck and drilled the holes for the two feet. This could be done in a drill press or free hand; however, Bryan showed the use of a jig he had made.

[The drilling jig consisted of a wooden housing holding a long drill chuck shaft that is free to rotate and move in and out. It is driven by a handheld drill. The housing is mounted on a shaft that fits the lathe banjo in place of the tool rest.]

The two 8mm holes for the feet are drilled with a Brad Point drill bit to avoid chip out. The position can be varied to allow for the feet to be pointing at the desired angle.

Flip the blank around and drill the single hole for the hair with a tailstock mounted drill chuck. The diameter of this hole should be sized according to the diameter of rope to be used. In this case a 7mm Brad Point drill bit was used.

Shaping the body – Remove the chuck and mount the blank between centres ensuring that a drive centre is used in the headstock (not a live centre as initially demonstrated by Bryan). The tailstock live centre will reference into the single hole at the top of the piece.

Turn a basic droplet shape that is larger towards the head stock and tapers towards the tailstock. Avoid sanding by using good turning technique and to save time. Bryan used a bowl gouge and a high lathe speed.

The upper spigot is effectively removed during shaping.

Marking the position for eyes and ears – with the piece still in the lathe, make a pencil line around the body at the point of greatest diameter.

Determine the positions of the eyes and ears on this line being careful to get a pleasing distance between eyes and symmetrical ear positions.

Locking off the lathe, drill out the holes for the eyes and ears with an 8mm Brad Point drill bit.

Don’t make the eyes too deep. The ear holes should be deep enough to receive the spigot of the ear which is later glues in.

Also drill a hole for the nose, again, with enough depth to have a spigot glued in.

Now cut off the bottom spigot and remove the body from the lathe – turning is complete on this part.

Eye detail – using a Dremel, add detail to the eyes. Bryan recessed above and below to give eyelid shapes and, on some examples handed around, eye lashes.

A mouth could be added here also but Bryan’s preference is to ensure the wood grain is positioned to mimic a mouth.

Making the ears and nose – mounting the chuck with 25mm pin jaws again, a blank is loaded to turn the two ears and a nose. This was approx. 30mm square and 150mm long but again, size is not critical. It was recommended to use a relatively straight grained wood for strength. Bryan turned it round with a spindle roughing gouge and a high lathe speed.

Using a small bowl gouge, the ears are shaped like a cupped funnel with a spigot sized to match the 8mm holes previously drilled. Turn the shape with an oversized spigot. Bryan then used a custom tool, made from a sharpened 8mm spanner, to size the spigot exactly.

Turn a nose in the desired shape (Bryan had previously made an oval shape) again with the 8mm spigot to fit the hole previously drilled.

Making the Legs – Bryan had some offcuts that were roughly 30mm x 20mm x 15mm. He mounted them between centres along the longest dimension and slightly off centre. He then turned the leg spigot round and only slightly rounded off the feet. The feet can later be refined by sanding.

Assembly – Medium CA Glue is used to attach the eyes. Using a piece of double-sided tape to pick up the eyes, ensure that you can see the orientation to ensure correct positioning. Add the glue into the eye hole then press in the eye.

[The eye inserts were purchased from Ali Express for <$20 for 100 varied colours and sizes]

Add glue to the holes for ears and legs and press them into place.

The Hair – hemp rope or similar type with the ability to unravel the strands is used. Add CA glue to the end of the rope to bind the fibres together then cut the rope to the desired hair length. [Beware, thin CA glue will wick up the rope quite a long way.] Glue in the rope into the top 7mm hole. Now the strands can be unravelled, and any embellishment can be done on the hair. Bryan suggested sparingly adding dye with a small brush.

Bryan suggested a price of $30 would be acceptable if this item was to be sold at market.

Project Sheet – https://sawg.org.nz/sawg/wp-content/uploads/2022/06/Water-Person.pdf

Bruce Wood – Gone Batty

Club Meeting 15 June 2022
Report by Rocky Ralifo

A great demonstration by Bruce on a cold dreary winter night.

Starting with a Matai blank 50mmx60mmx440mm.

  1. Marking the centre first on both ends of the blank using a centre making a indent for steb centres. Choosing the handle end and the top end of the bat
  2. At the top end of the bat mark and punch 2 x 20mm centres offset on either side of the centre hole.
  3. On the same end also mark out 2 x 9mm offset centre holes on either side of the centre hole on the same plane.
  4. Face shield down and running at 2000rpm
  5. Take off the corners of the blank using a spindle roughing gouge. Identify & Mark the dimensions of the ball using a pencil & ruler.
  6. Bruce then centred the blank to the 20mm centre mark. This off centre on the bank at the same time accentuating the ball portion of the bat.
  7. Shaping the handle and head ends of the bat.
  8. Switching to the spindle gouge.
  9. Bruce then moved to the 9mm centre on the head end of the bat. Sneaking up on the back of the ball portion of the bat creating access for the spindle gouge to turn the ball referencing a centre line on the ball portion.
  1. The skilled Bruce then using a spindle gouge started to round the ball portion of the bat into a sphere.
  2. Spraying with ondina oil to reduce dust Bruce at 750rpm sanded the ball portion to desired grit.
  3. Returning the blank to the 20mm centre point on both ends of the piece. Bruce finished turning the bat on either side of the ball portion. Cleaning up these sections using a skew.
  1. Parting the handle portion down to the thickness 30mm followed by tapering the handle portion towards the 30mm thickness.
  2. Finally shaping the handle bead and then rounding off the top end.
  3. Using ondina oil Bruce then sanded the bat portions to the desired grit. 120G>180G>240G>320G. stopping the lathe to sand along the grain of the piece if there are deep scratch marks from the previous grit.
  4. Parting the ends of the piece to thin nibs, taking the piece off the lathe and sawing off the nibs followed by sanding.

This completed the demo.

Janet McDonald – Colour and Embellishment

Club Meeting: 8 June 2022
Report by: Bob Yandell

Janet began with a background on her experience and knowledge of craft, specifically needlework and quilting which gave us an understanding of where the understanding of colour and multi media we see in work originates. Her journey to wood turning via second hand shops buying wood bowls and the like upon which she applied her pyrography skills and understanding of colour and texture to create saleable items.

The demonstration that followed was thinking of the square, rather than outside the square which is generally what we wood turners do making bowls, and Janet showed us examples of 3 blocks, original 40 x 150/200/250 approximately, had been turned by fellow turners Colin Mitchell and Denise Donovan, into a profile of a hip flask/Gordons Gin bottle with a longer neck. These items, whilst nice in profile, were plain and unappealing, become the canvas for Janet’s creative mind. Don’t sand beyond 320 – 400grit as if the surface is too smooth the colours will not adhere properly.

Janet then tabled many examples of what can be achieved through the use of carving, pyrography and the addition of colour and other mediums, such as felt.

The following are some of the key points Janet showed and whilst not in the order presented will be of assistance and guidance for us in turning a plain piece of wood into a colourful item.

  • Plan what you are going to do 
    -Create a drawing either by tracing onto lunch wrap or free hand onto lunch wrap. You keep this image for future use. Indicate the colour you want on the original and use this as a reference. 
  • Put another layer of lunch wrap which you have put pencil rubbings on so you have a “carbon paper “ between your drawing and the wood. Inked Carbon paper is not recommended as the ink can stain the wood and will not be able to be removed.
  • Burn the outline of the image with a pyrography pen using 20 gauge wire. The width and depth of the burn dictated by the image you are looking for. Burning prevents colour bleed whereas a black sharpie will not.
  • Application of colour is by using U-Beaut Concentrated Non Toxic Water Dyes. You require very little and Janet showed a board with concentrate on one side and beside it the colour at 50% and it clearly demonstrated how little you need. Wear gloves. Remember to put the lid on as it stains. You can premix and store. Carefully shake before use and then use the product on the lid first as it will probably be sufficient.
  • Take your time and use a clean brush with a fine point. Use a tooth pick for fine detail. Cotton buds are also an option. Clean water for each colour. Multiple applications when dry will intensify the colour 
  • Alcohol based stains can be made using “Sharpies” purchased from Whicoulls as original rather than copy sharpies have a more concentrated pigment.
    = dismantle the sharpie and take out the sleeve of ink and put it in a plastic container 60 – 100ml and then add Isopropyl Alcohol, 90%, and shake and leave it to defuse the concentrate. The resulting product is more translucent than water based products. 

Bruce Wood then demonstrated the process of turning the bottle shape that Janet has been using for her decorating.

Kieran Fitzgerald -Making Tools

Club Meeting 1 June 2022
Report by Denise Donovan

On Wednesday 1st of June Kieran Fitzgerald gave an enlightening and thoroughly entertaining talk on Making Tools for your workshop. here were no less than 51 tools in Kieran’s collection, all of which had a practical and sometimes ingenious use.

We started off with handles: Handles are a great spindle turning project for new turners and can save them a few dollars by buying unhandled scrapers and gouges etc and making their own. The rules for a tool handle are as follows … for every inch of overhang on gouges there should be 5 inches of handle, and for scrapers and skews 3 inches of handle to 1 inch of overhang.

But handles are not just limited to gouges, you can make them for, Allen keys, collet keys, knock out bars, sawblades, the limits are endless, and Kieran’s collection will attest to this. I don’t think he had anything without a handle.

Next up an amazing range of tools fashioned from other tools:

  • A knockout bar from a wheel brace, with handle of course (I’m not sure what he’s going to use when he needs a wheel brace … although I’m sure he’ll improvise)
  • An Awl from a screwdriver blade (new handle of course)
  • Large screwdriver fashioned into a point tool
  • Guitar string for a burning wire (again with handles)
  • A thin parting tool from a hacksaw blade (handled? … yes indeed)
  • A thin parting tool from an old bone handle dinner knife (guess what … a new handle … you get where this is going don’t you …. A handle for everything, and everything with a handle 😊)
  • A small skew purpose built for turning away tenons on bowls, made from an old screwdriver
  • Drill with a handle for a depth marker when turning
  • Handmade chatter tool from a reciprocating blade (for end grain only)
  • Open ended spanners sharpened for turning consistent diameters
  • Sanding mandrels from screwdriver bits of engine valves

Amongst the remaining assortment we had the following gems:

  • Off centre turned mallet head and handles
  • Dead blow hammer made with lead shot in the head
  • Bowl depth gauges – screw type and figure 8 type
  • Home made compass from wood, nail, and pencil
  • Sanding plate with a spigot mount – for those without a sander
  • Vacuum coupling assembly
  • Various pen turning tools such as a reamer from a file, barrel holder, and a pen press
  • Morse taper with tenon and ball bearing race for hold a piece e against the tailstock
  • Metal tapered spindle on a shaft to hold a polishing wheel
  • Spindle turned paper towel holder
  • Sanding sealer jar lid with paintbrush insert
  • Drum sander

These tools are just some of the ideas you yourself can make and use – some of the projects are also on our website – so let’s take inspiration from Kieran’s Kiwi Ingenuity and start creating

Thank you, Kieran, for a great talk, and the giveaways to help some newbies start their own handy tool collections.

Daniel Strekier – Amazing Grace

Club Meeting: 16 March 2022
Report by Denise Donovan

On Wednesday we had a visit from Daniel Strekier of Masterpiece Woodworks, a passionate woodworker, with an eye for a challenge.

Weighing in at 60kg, with a top speed of 47.2 km, let me introduce Grace, the result of a year of hard work (6 months if you don’t count breaks, which I’m sure were much needed). Grace has over 500km of trail riding tucked under her tidy seat, with many more to come.

This bike is a woodworker’s dream, featuring amazing laminations of Walnut, Ash and American White Oak, a hollow wooden frame, 22 speed derailer system, hydraulic brakes, and the fattest tubeless tyres you ever saw on a bike.

Each wooden piece on this bike has been lovingly handcrafted by Daniel himself, through trial and error, a wealth of woodworking knowledge, and an “anything is possible” attitude.

Daniel originally started the bike by accident, basing its’ design around 2 tyres he purchased for a remote-control gate that never quite happened, instead deciding he needed a challenge, and a project that displayed his talents to current and future customers.

The 17.5 kg tyres and rims were started with a plywood wheelbase, and white oak rims with finger joins. The mudguards were a 2-way lamination using three 2mm sheets which provided quite a challenge, using a stave process popular in barrel design and hot water to shape the brackets. They were then strengthened with an epoxy fiberglass underlayer. The solid forks were each assembled from 9 pieces of wood, with a steamer utilised to bend each individual layer.

The frame design of the bike took 4 hours alone. Assembly of the 8kg framed consists of a basic MDF frame designed around a mountain bike. The original design also used a normal gear system but was later changed to a Shimano 11 x 2 gear hub. As “straight lines are too easy”, the unique lamination was done by cutting and gluing 2mm strips, creating curved lines by cutting several strips together on a band saw, and then mixing them up.

Not everything could be wood, so improvisations were made where strength was a factor … the handlebars and chain guard encompasses carbon fibre, the wheel axels are steel, and the pedals are aluminium wrapped in wood

As if the bike wasn’t enough, Daniel has also made his own matching helmet using resin and wood cut with a plug cutter, and a stunning wooden chain and functional wooden lock

All this was completed over a 12-month time frame, with many hours just standing and staring while thinking over the technicalities, many sleepless nights, while also building a business.

In the words of Daniel … “You can do anything you want if you want it enough”

Grace of God was so named as it translates to “Thank you God for the possibility and Capacity”

Keep a lookout for Daniel’s next project – a wooden e-bike

https://masterpiecewoodworks.net/grace

Dick Veitch – Stepping up on a pencil pot

Club Meeting: 25 May 2022
Report by: Graeme Mackay

A new take on Barbara Dill style pencil pot with a demonstrators variation. Dick Veitch presented a clear, easy to follow view of the multi-axis pencil pot from the SAWG project list.

The demonstration highlighted the progression through the stages of the Barber Dill style project that provides an excellent exercise of shaping curves, multiple axis, and sharpness of form. Dick raised the issue of deciding on grain, wood features and wood types. In this project, the choice highlights the clean curves of this project.

There was a simple focus on the basics: accurate measuring, working to the plan, sharp tools, and quiet cuts.

Technical points:

  • Ensuring that the centres are on an equilateral triangle.
  • The spigot fixes the cutting line is the same in each hand.
  • Following simple marking lines fixes the alignment of the individual axis points.
  • Axis numbers need to be clearly marked. Use a felt tip for the beginning
  • As curves need to be replicated, variations and incorrect cutting clearly show up.
  • Small cuts and check

Dick Veitch variation: beads across the individual phases. In this case two beads formed in a standard manner. Initial lines with skew chisel, once formed cleaning with spindle gouge, and the bead lines finished off with a sharp skew.

The inevitable question from the floor arose over running the beads, joined around the three faces. A technical complicated discussion was followed the main point of “no easy answer.”

Dick Veitch final reminder: planning, measuring, and Sharp tools and that the SAWG project sheet gives excellent guidelines. An excellent demonstration.

Richard Johnstone – Wonky Wood

Club Meeting: 18 May 2022
Write-up: Holm Miehlbradt

Richard stayed with the term theme and incorporated an off-center element on his turned platter.

The project started as a traditional platter: blank mounted on a faceplate, turn the bottom of the platter including a spigot, mount on the spigot and turn the top of the platter. The only difference at this point was the slightly longer spigot than for a simple platter so that an offset can be achieved later.

Then the fun begun. The platter was mounted in the spigot at a slight angle. This way crescent like grooves can be cut on the rim of the platter. Richard cut the grooves with a 55° bowl gouge. There was a good discussion, with sometimes contradicting opinions (!), about which tool would cut a better groove and how to adjust the spigot offset to achieve a desired groove pattern.

To enhance the rim embellishment, Richard colored the grooves (he used a wood dye). Then he sanded the rim surface to remove the excess color and thus only left the coloring in the grooves.

Thanks Richard for the entertaining demo. A lot of ideas to explore using the spigot offset.