Category Archives: Unclassified
New Project Sheets
This week we have one new project sheet, and 4 updated sheets
Updates
New Project Sheets
A couple of new project sheets based on the demos, and a revision of Guilio’s Spoon Box
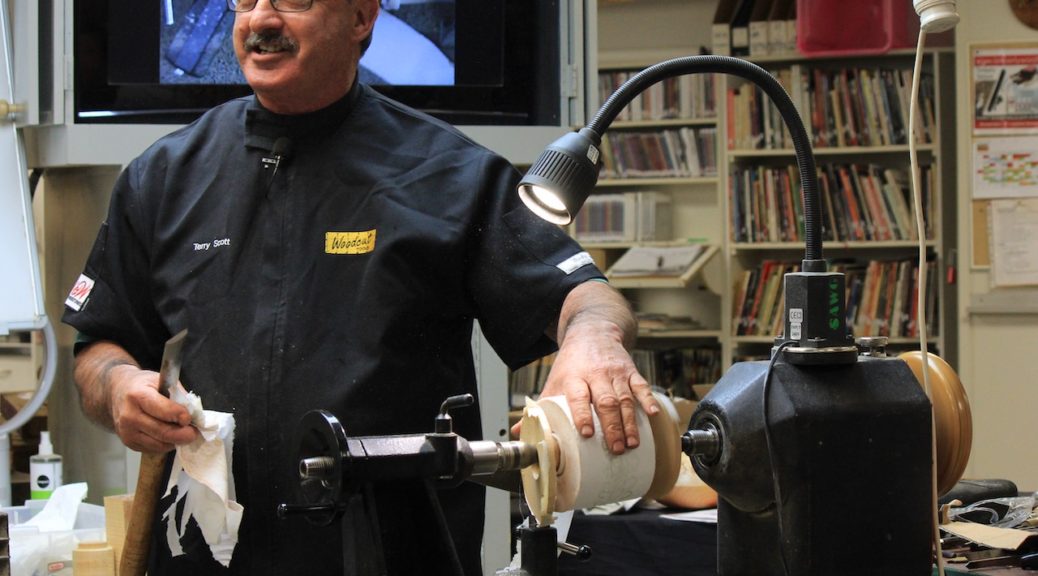
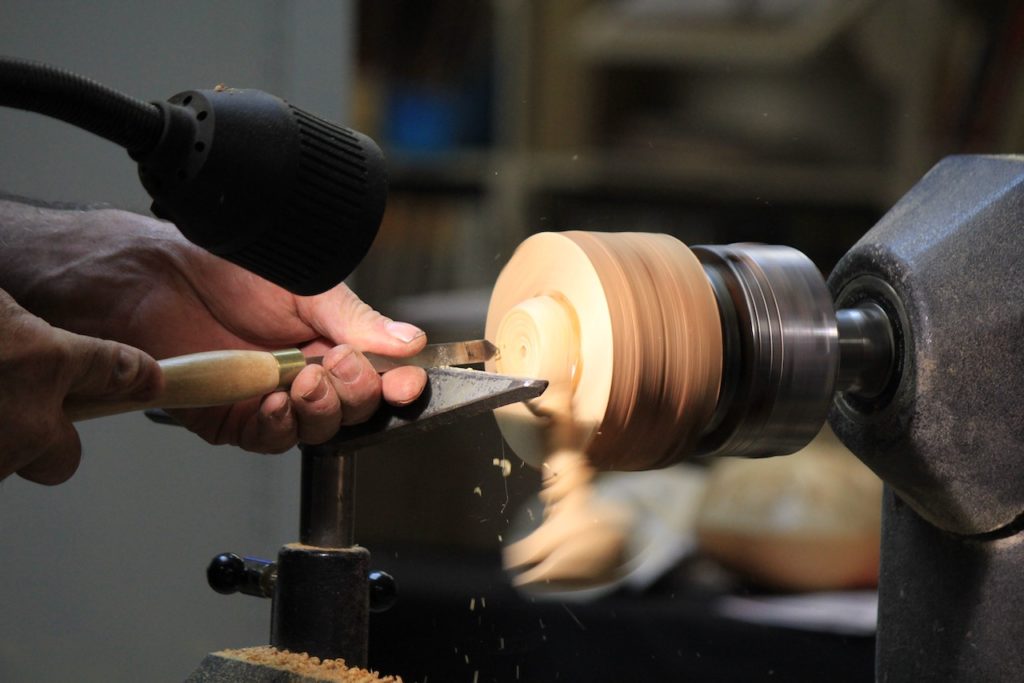
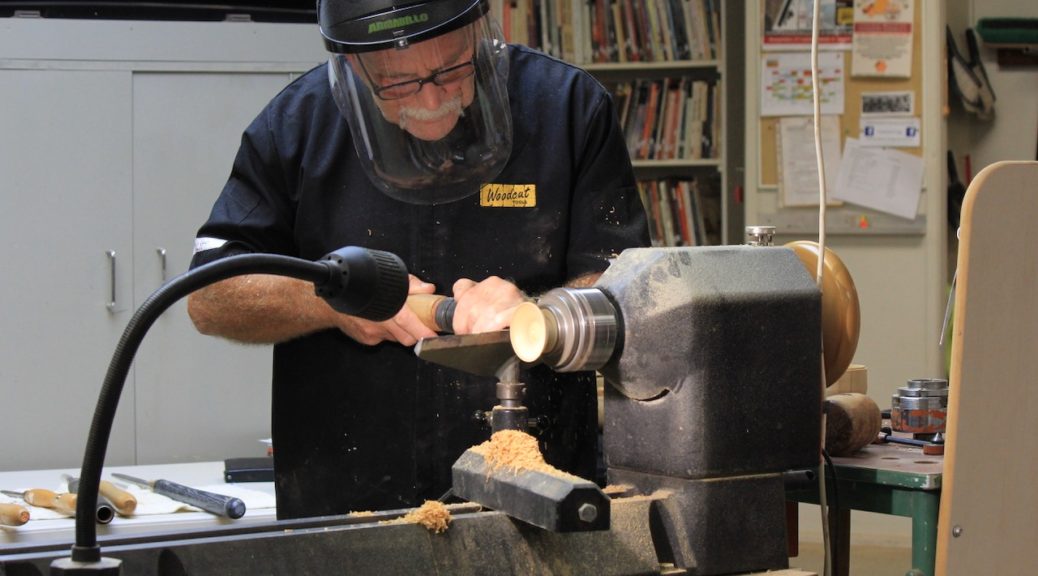
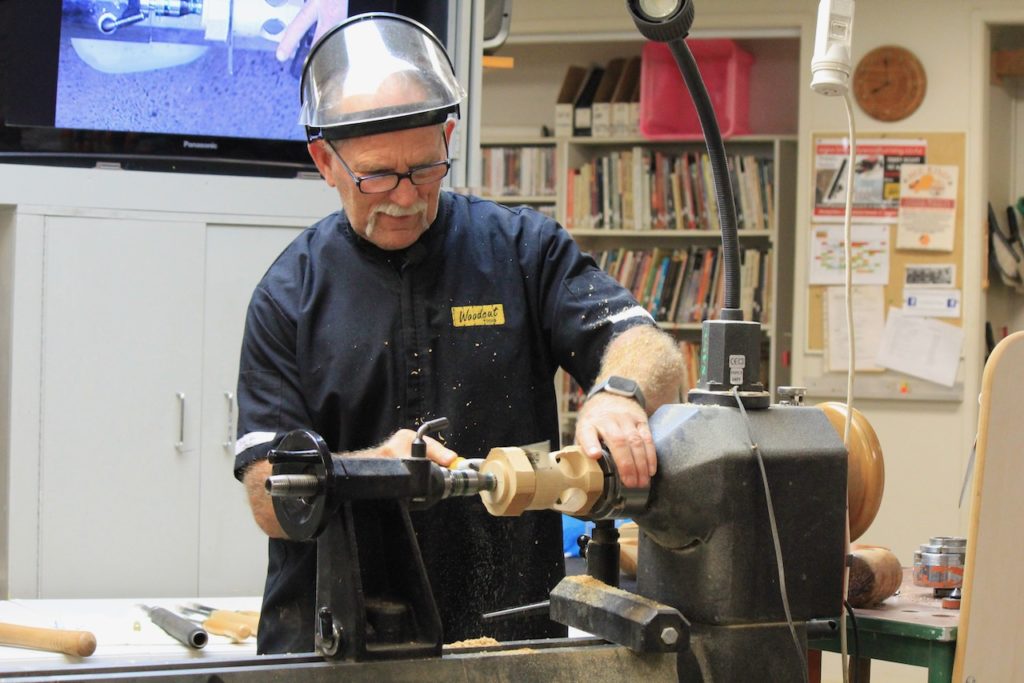
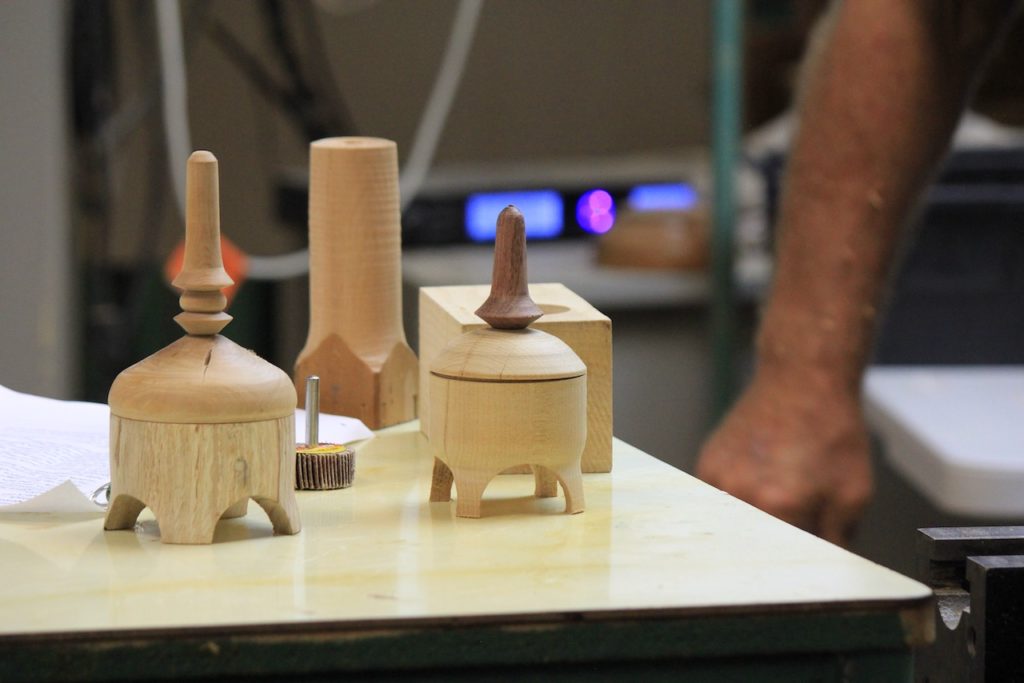
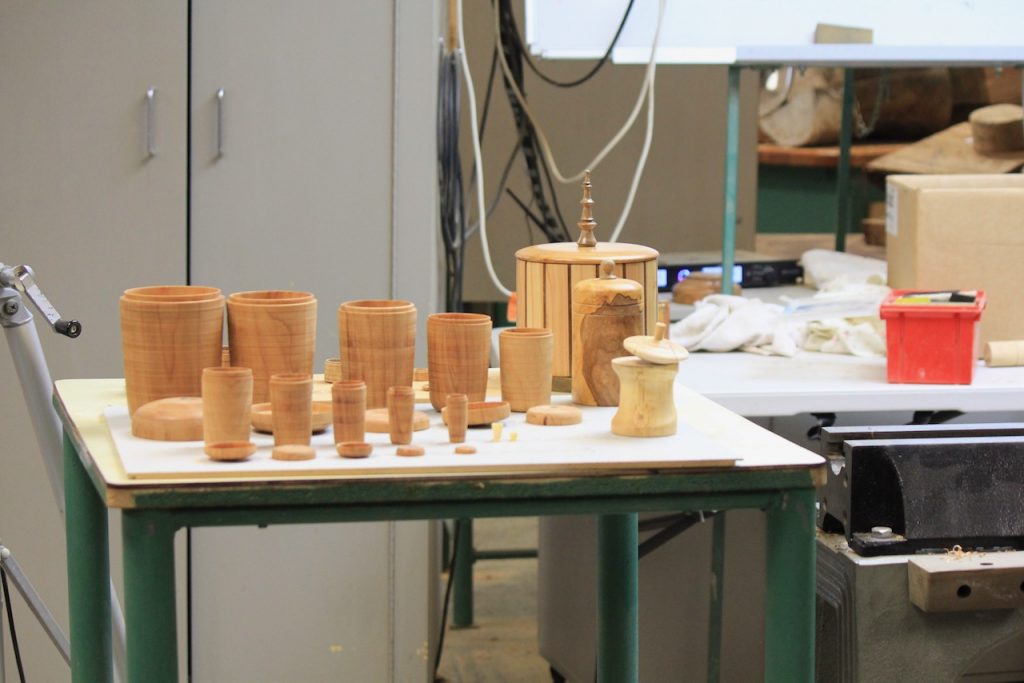
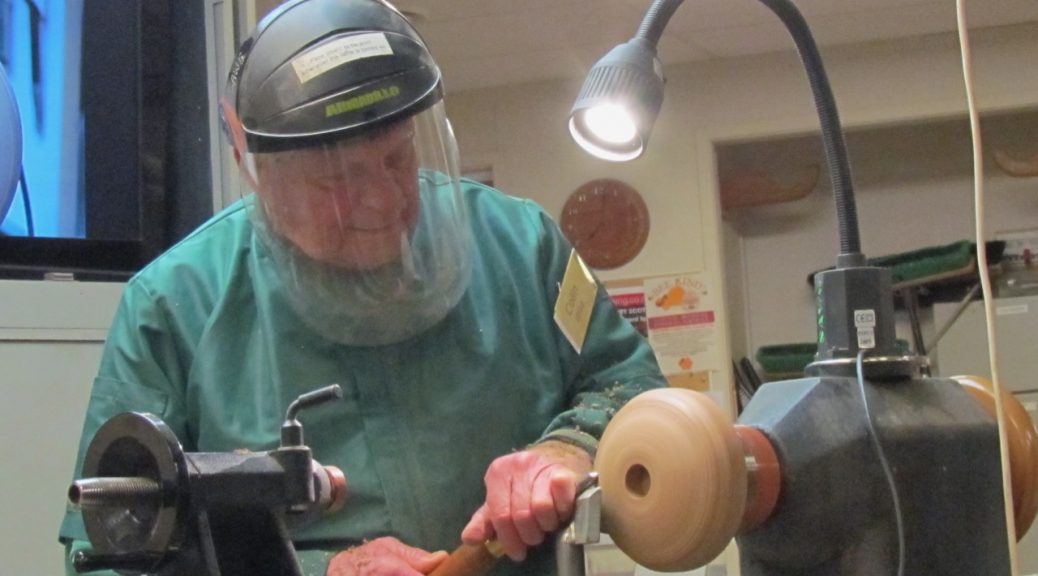
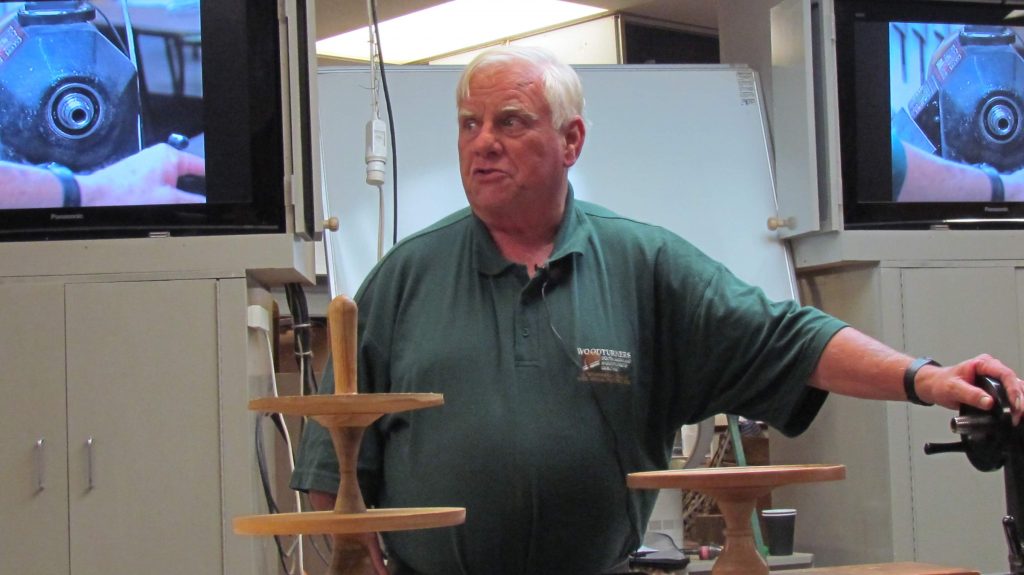
Terry Scott – Spoon Lidded Box
Club Meeting: 11th March 2020
Report by: Bob Yandell
The “House Full” sign was up and Terry was at his best – humour, skill and knowledge for all present. The start was, as only Terry, the entrepreneur and entertainer could, an opportunity following the Covid-19 outbreak and subsequent shortage of toilet paper. We woodturners could meet the shortfall by providing toilet paper by supplying the leaf from Salanum maurtianum plant, better known as Woolly Nightshade or Tobacco plant which Terry observed was growing in plentiful numbers either by itself or in combination with our turnings and a few chemicals mixed together, compressed then peeled like a veneer and rolled. If you weren’t there you missed the business opportunity of 2020.
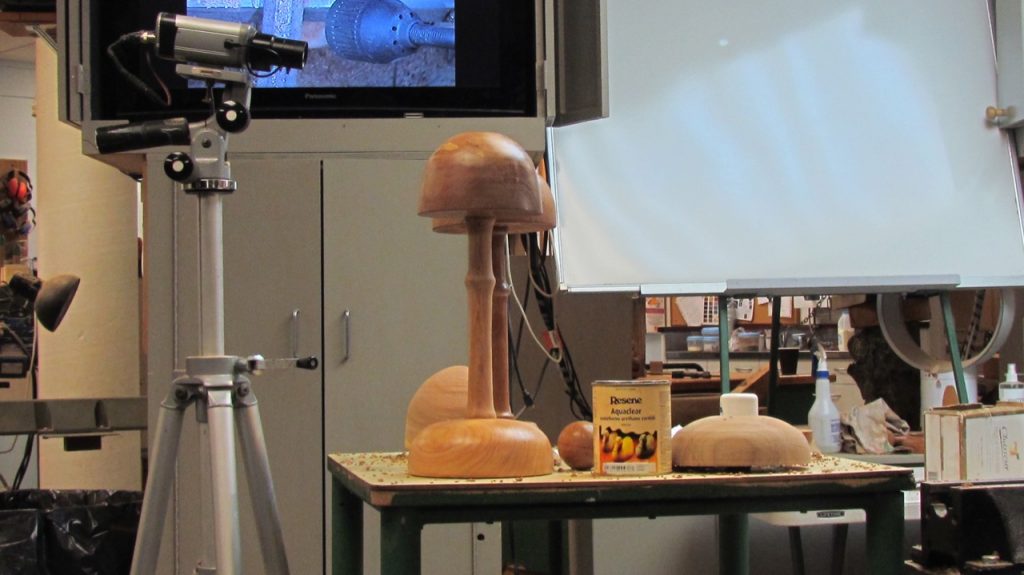
The actual demonstration began with Terry showing examples of spoons and his development of the concept into the lidded box. Spoons for a salt pig through spoons with long handles. (Refer Club projects sheets – Spoons for the basic concept).
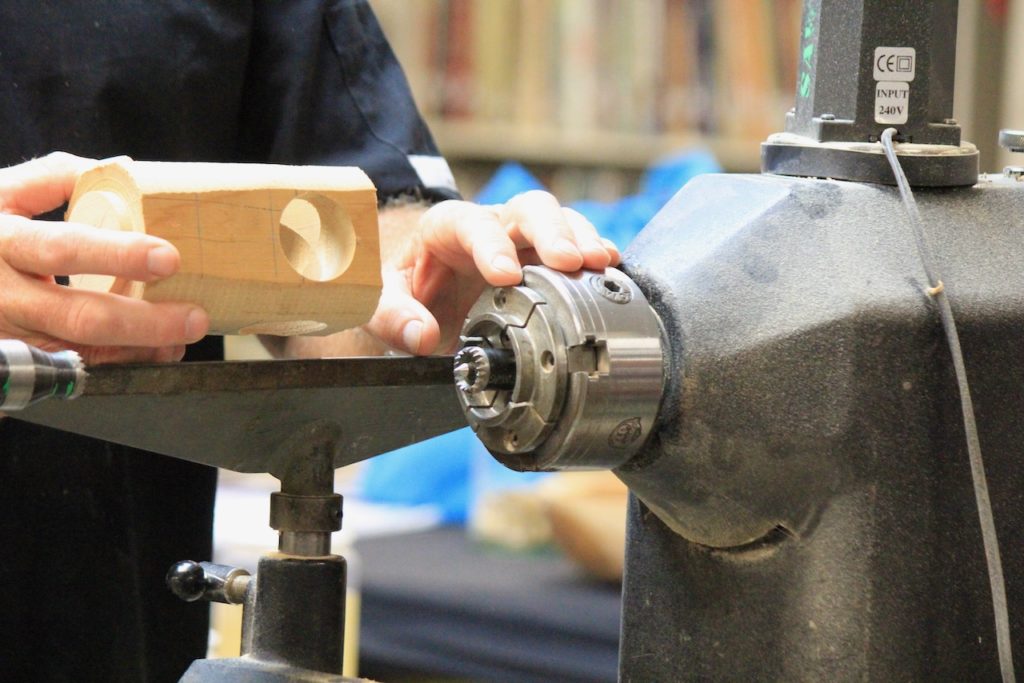
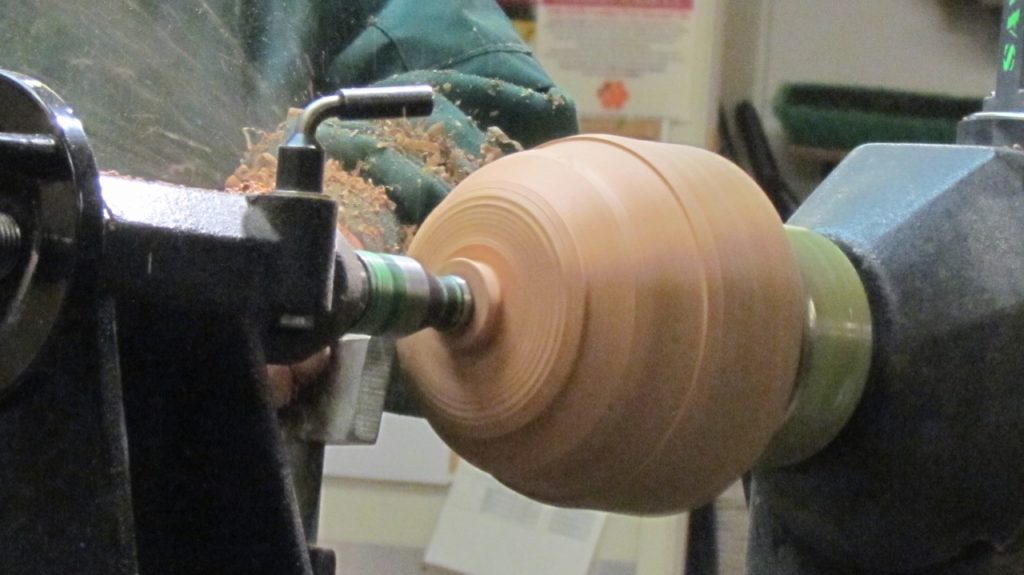
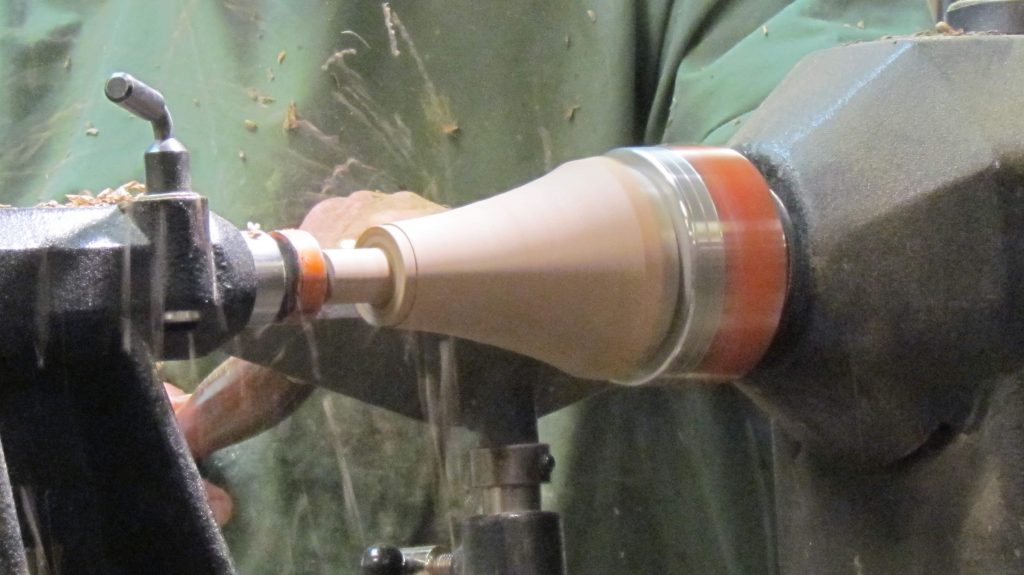
Terry started with a block of Kauri 60x60x180mm. Hard woods are best used when making spoons. The block was mounted between centres and turned round. The final diameter was 53mm based on the internal dimensions of the sphere cutter being used and a 48mm spigot was put on each end. The lid section was parted off at 64mm. The box/spoon section was that left. At this point Terry informed that the length of the spoon was dictated by the swing over the lathe and a maximum length for the lathe was 400mm to which the allowance for the lid and spigots “X”mm is to be added.
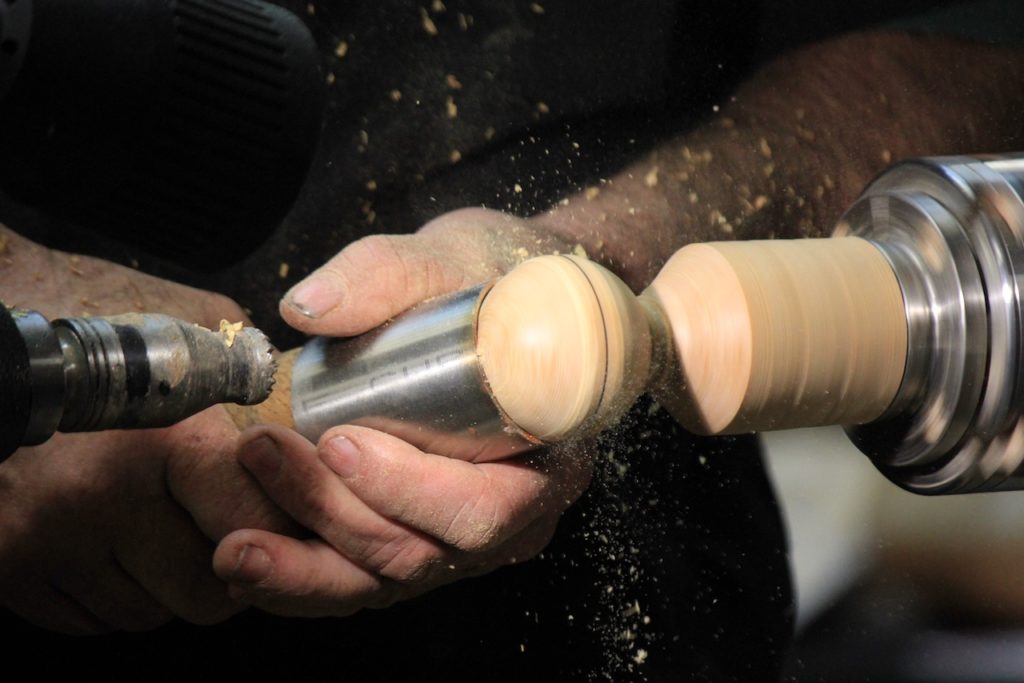
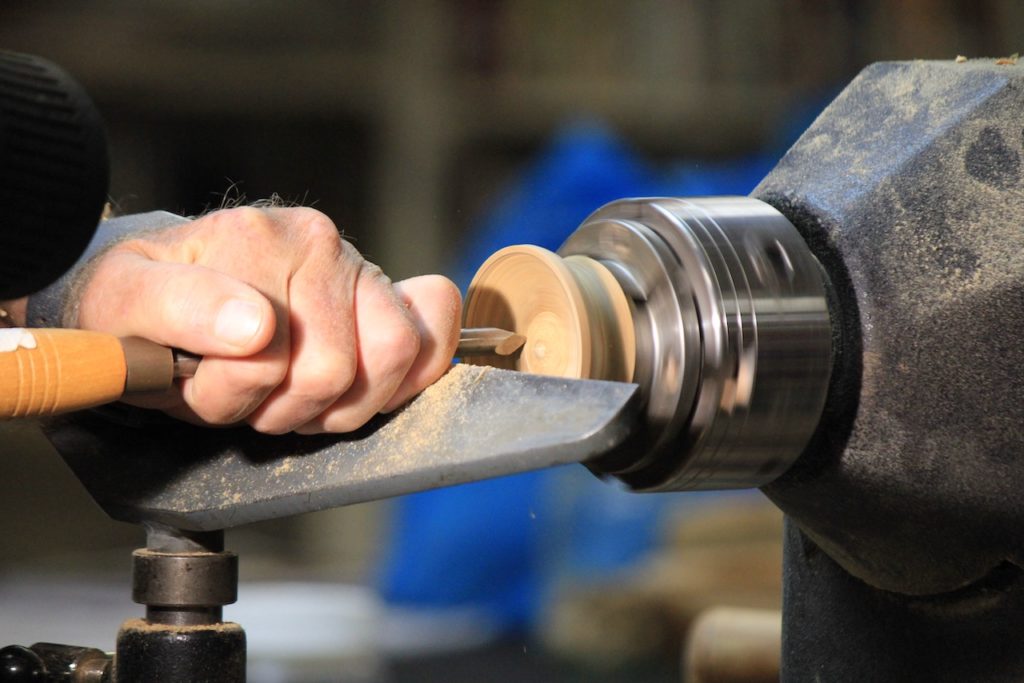
The Spoon/Box portion was mounted in the 50mm chuck; end cleaned up and a line defining the centre of the sphere clearly drawn, approximately 28mm in from the end, and a fainter line defining the sphere diameter marked. This latter line is where the handle starts and a cut on the lathe head side of the line, with the parting tool indicates the beginning of the handle profile and diameter. The distance between the line defining the centre of the sphere and the external diameter is divided into 4 equal parts(3 lines either side of the main line) because a sphere is formed from 4 flats( starting with the centre line being the beginning of the curve and end furthest from centre being the end of the curve and the beginning of the next and repeating until curve complete).
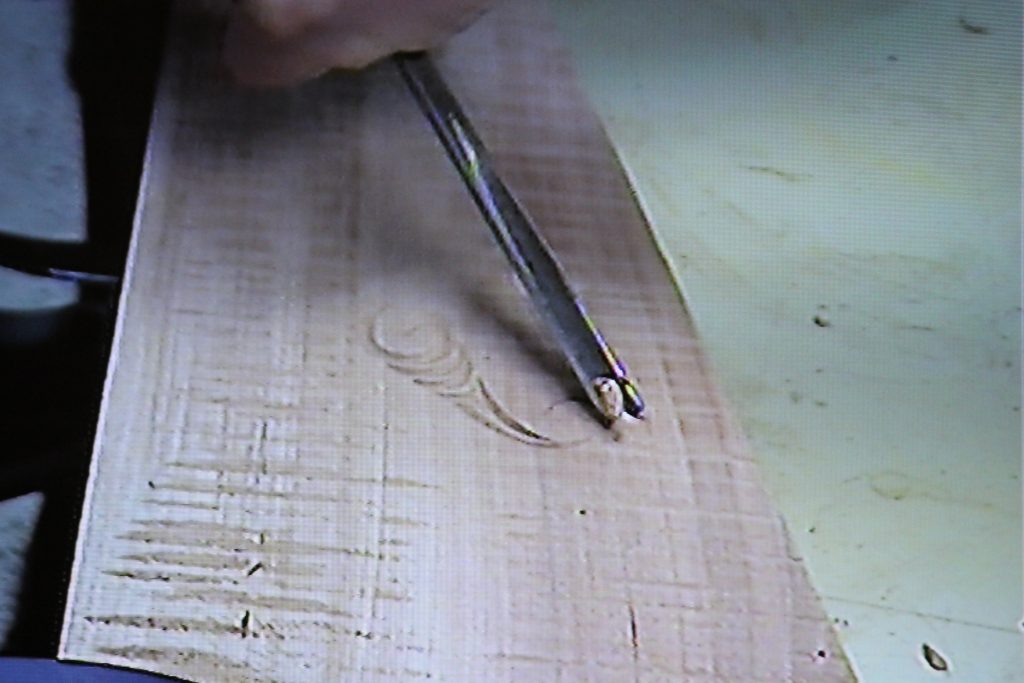
The sphere profile is refined gently using a pipe tool with the lathe running. This is a piece of tube with a handle fitted in one end that allows approximately half the diameter to extent, like a chisel tip, and is sharpened on the belt sander. The “roundness” is checked using bottle caps and until no gaps between wood and cap. Sand and finish.
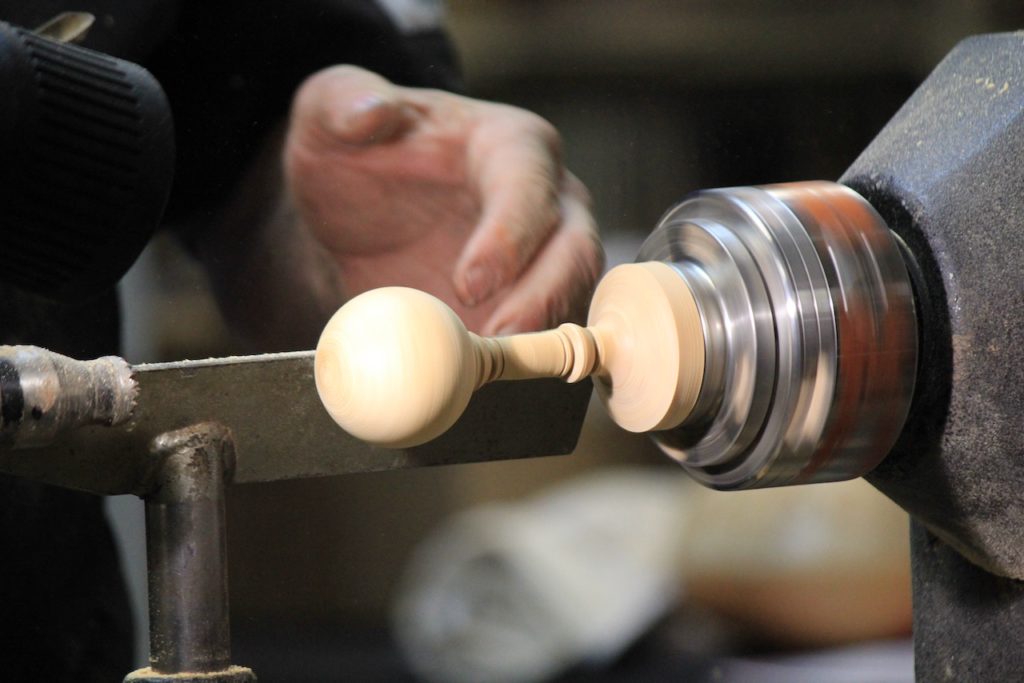
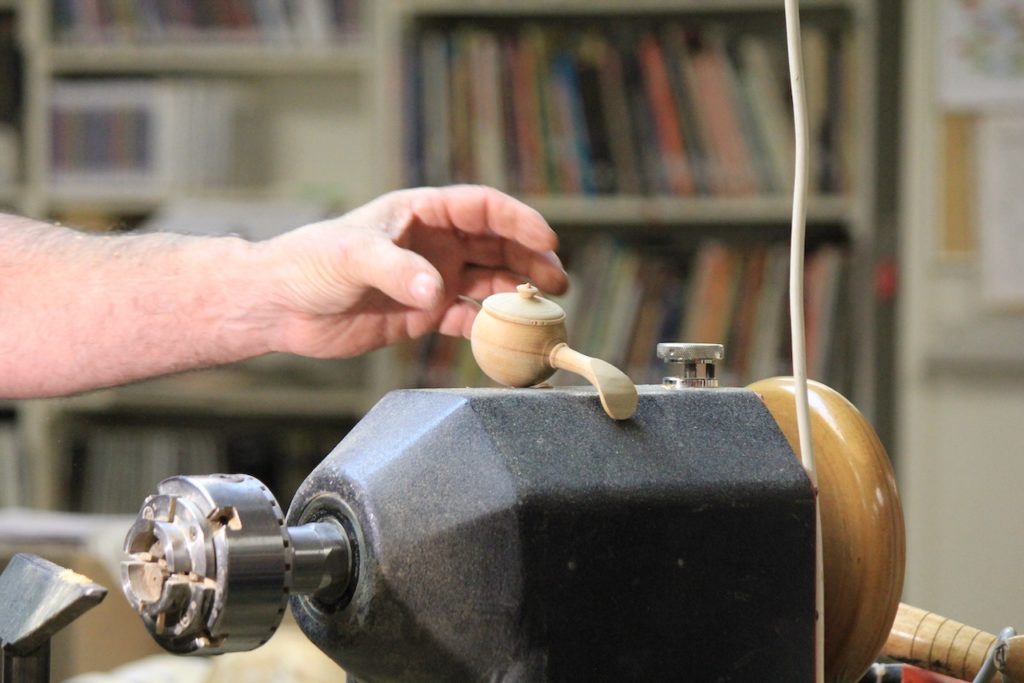
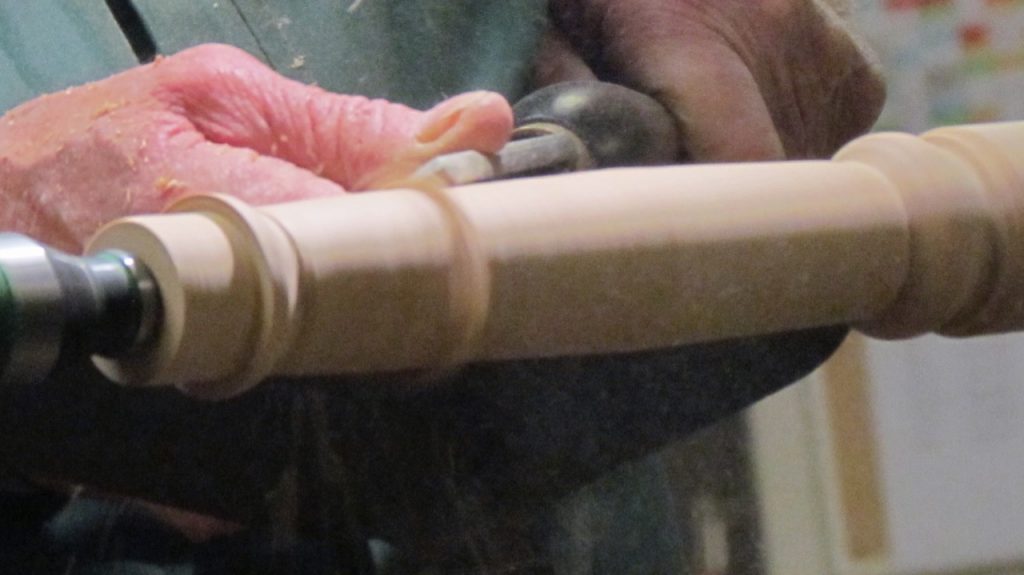
Complete the handle profile and part off. Texture, captive ring, may be pyrography – sand and finish.
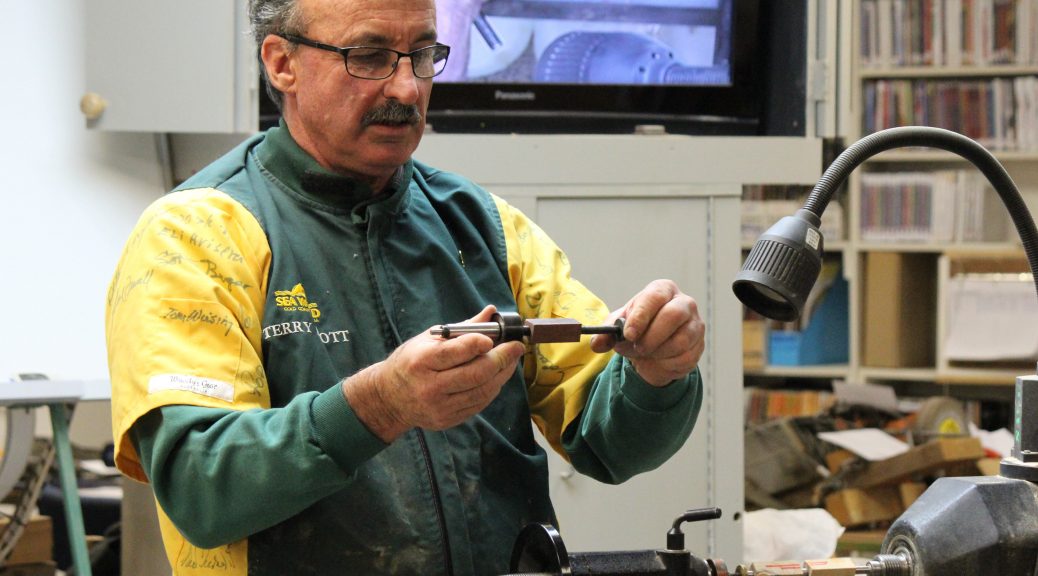
The next stages require a jamb chuck and ideally a second chuck for the yet to be made lid.
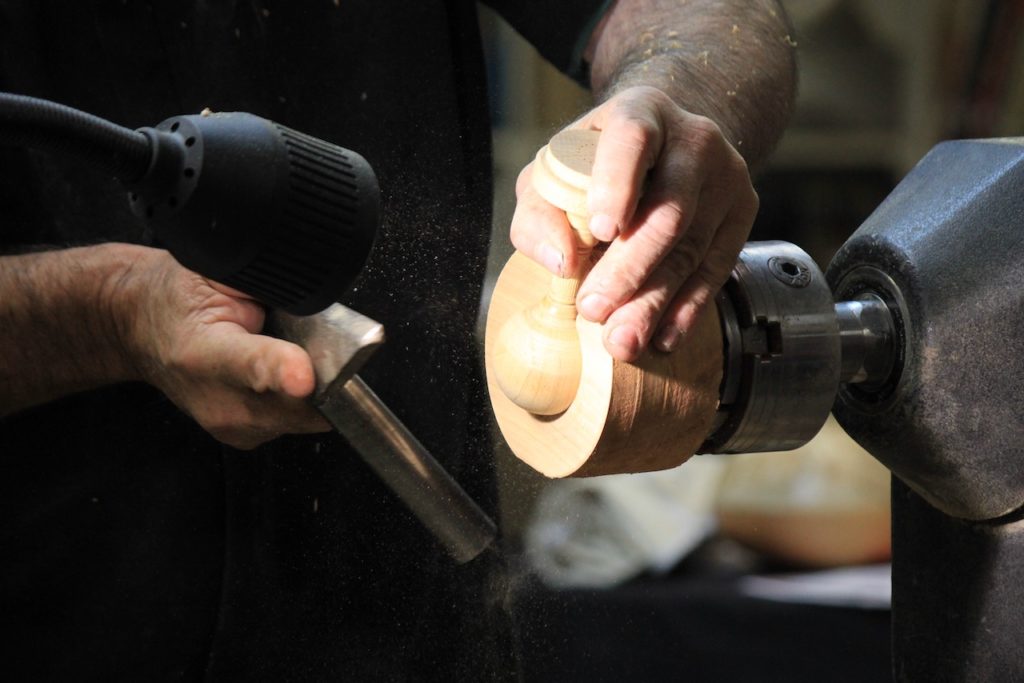
Making the box requires a jamb chuck mounted in 50mm chuck. The sphere plus handle needs to fit snuggly so handle is flush with face of the jamb chuck. Determine diameter with callipers or Vernier and mark face of jamb chuck and turn out always checking fit. It must be snug and firm. Cut a slot to accommodate handle. Terry used an Arbortec. Drill a hole from the side of the jamb chuck into the bottom to assist removal. Position the sphere in the jamb chuck to optimise the strength of the grain and visual appearance. Hot melt glue can be used to ensure no movement of the sphere. Mark the centre so a drill can be used to define the depth of the cavity of the box. The depth is the diameter id the sphere less wall thickness.
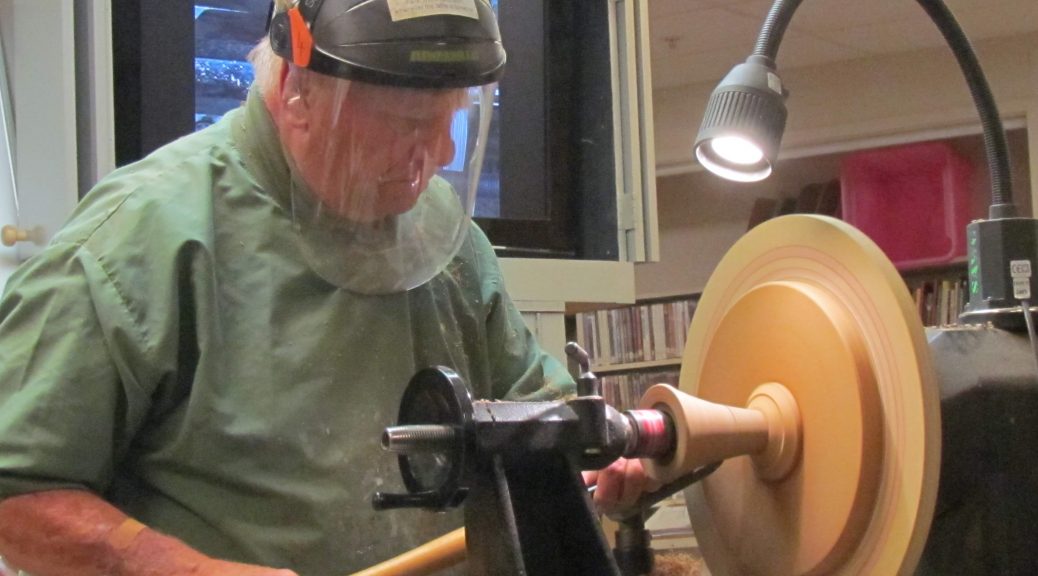
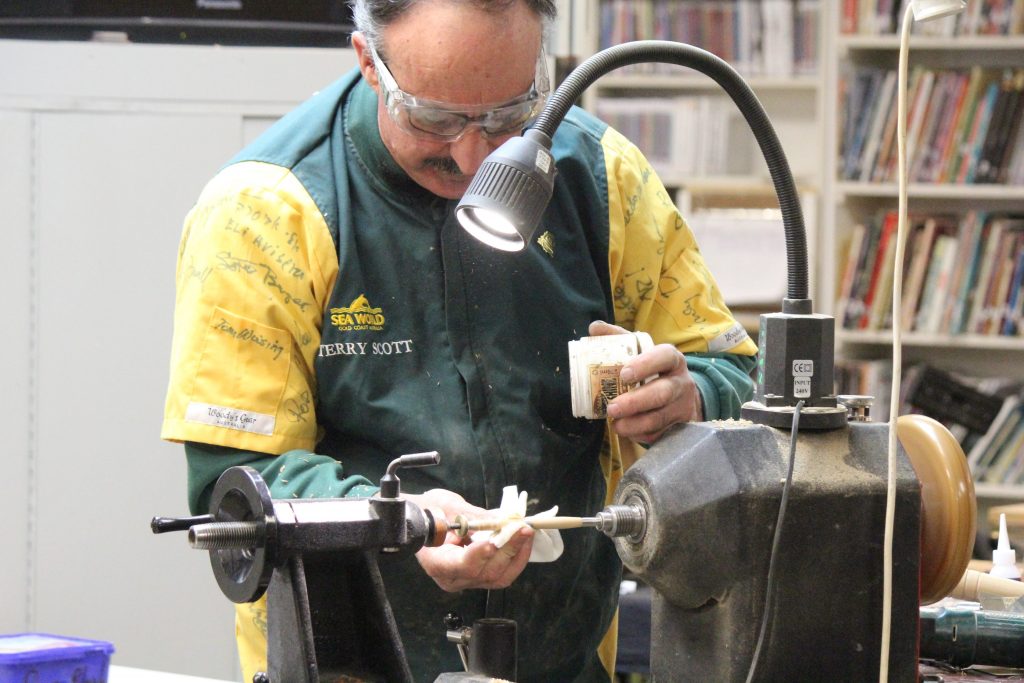
Cut the opening for the lid and hollow it and cut the rim to accept the top part. Finish all these surfaces. Terry used a cup tool and emphasised the need to rub the bevel. He also used a scrapper in a circular motion, like the hand on a clock to maintain the inside of the sphere.

Next stage was the lid using the piece set aside at the beginning. The face is cleaned up and the internal hollowed so that the curve is a continuation of the internal curve of the box. There is sufficient wood so Terry was able to develop the external profile so it matched/complimented the box. This is where a second chuck is of value as you can produce the lid and then fit it to the box to finish the top albeit a finial, knob or handle. Complete the handle profile and part off. Texture, captive ring, may be pyrography – sand and finish.
Garry Jones – Ring Box
Club Meeting: 4th March 2020
Report by: Cathy Langley
Garry Jones’ version of this term’s “lidded box” theme was a small jewellery box for storing women’s rings (both under and above the lid) with four feet and a finial providing elegance. Garry had brought a number of finished examples illustrating a range of possible designs.
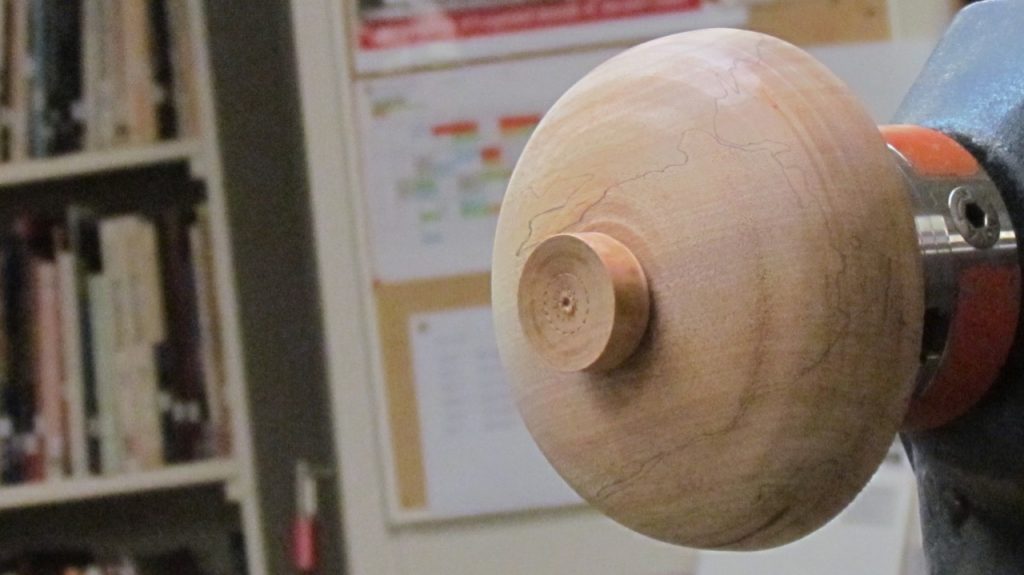
He started with a block of timber 70 x 70 x 150 cm, emphasising that the blank needs to be exactly rectangular so that the feet are equally spaced. On each side of the blank, he had drawn a line 40 cm from one end for the lid, and had marked the centre point of the longer end on each of the four sides. At these points, he had drilled a 40mm hole into each side, meeting in the centre and creating what would eventually become the space between the four feet.
Using a steb centre in the chuck, he created a spigot on each end, remounted the blank with the holes at the headstock end. He marked a line just beyond the holes on the side toward the lid section, to indicate where the bowl shaping would begin. He then turned the lid section to a cylinder and shaped the bowl and feet, with a narrower diameter where the line had been drawn earlier to indicate the base of the bowl.
The next step was to part off the lid section and hollow out the interior of the box. Garry used a Rolly Munro mini-hollower to leave a raised “finger” in the base of the bowl to hold the rings. Garry then faced off and designed the rim of the bowl as for any other lidded box. He left the sanding and finishing to our imaginations (except to suggest that the edges of the holes be smoothed with a flapper wheel in a drill) and parted off the blank, separating it from the spigot at a point that cut into the bottom edge of the pre-drilled holes to separate the four feet.
The next-to-last step was to mount the lid section in the chuck, face it off, and hollow it. (Garry suggested that a dimple could be left in the inside of the lid with texturing applied around it, as he had done in several of the examples of finished ring boxes that were passed around.) He presented the base of the box to the mounted lid several times to ensure a good (and fairly loose) fit, and then completed the outside of the lid, leaving a spigot at the headstock end which could either be turned as the handle for lifting the lid, or as a 10mm (or just under) dowel over which a finial could be glued into place.

The final step is optional. Several of Garry’s examples had a finial on the box 50-80 mm long with an approximately 25mm base, narrowing to 12-15mm at the top, to hold additional rings. If you decide to do this, mount a 40 x 100 mm blank of similar or contrasting wood, drill a hole 10mm in diameter and about 10 mm deep, bring up a live centre in the tailstock, and shape he finial. Finish and part it off, and glue it over the dowel at the top of the lid.
Beautiful!
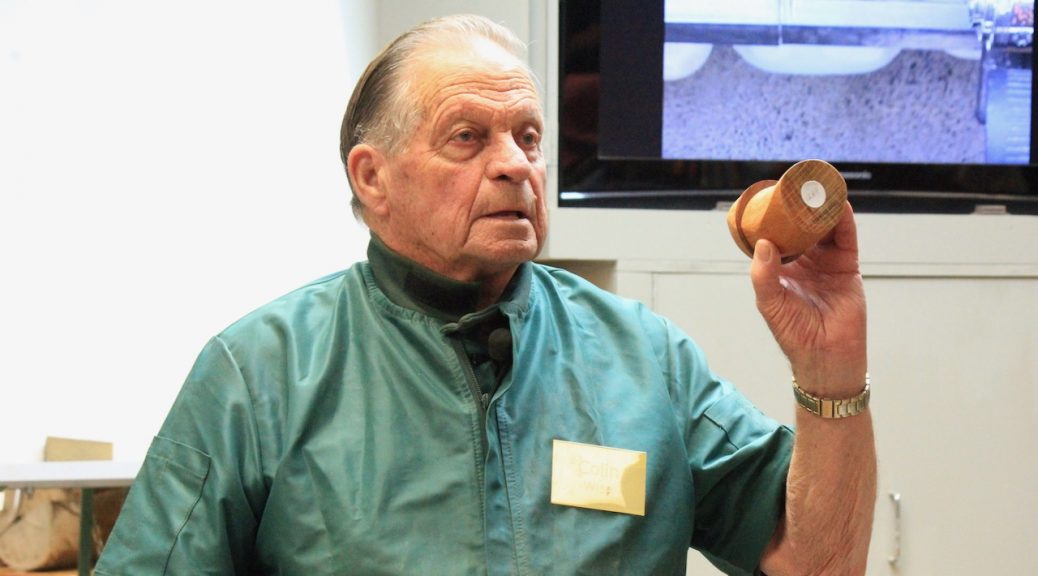
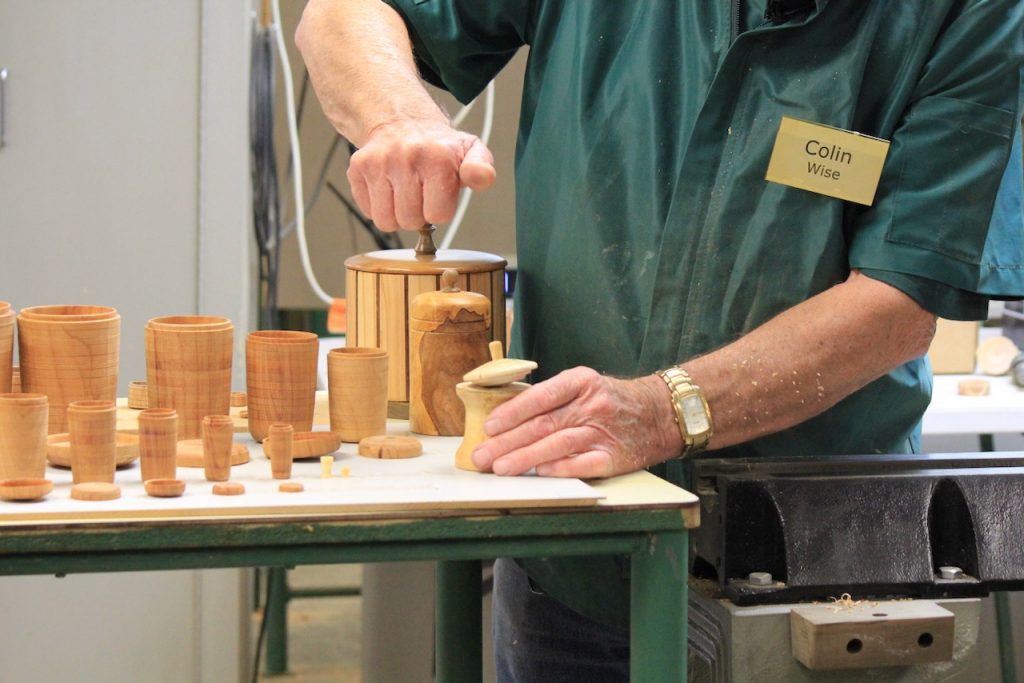
Colin Wise – Offset Lidded Box
Club Meeting:26 Feb 2020
Report by: Murray Wilton
Colin opened his demo by displaying a range of lidded “boxes” he has made over the years. There was a set of 7 boxes, each one smaller than the next so they could be stacked to fit into the next largest box. Like Russian dolls. Apparently the world record for the number of boxes that can be made to stack in this way is 33. Terry has managed to get up to 17. Can anyone meet the challenge and beat that? The walls have to be so thin that turning must be done carefully with accurate measurements. Colin made his septet of boxes early in his turning career. He also revealed a sample of the finished product he was aiming to turn this evening and showed off a square box beautifully made from laminated timbers.
Colin’s demo started with a block of bird’s-eye pine, about 60 mm square and 180 mm long. He had previously rounded off the block and cut an off-set spigot in one end about 6mm from the true centre of the box, with the equivalent marking at the other end for holding with a steb centre at the tailstock end. With the block held by the offset spigot, he drilled a hole with a 32 mm Forstner bit, drilling slowly to avoid burning and ensuring the depth was sufficient to leave a box bottom about 5 to 8 mm thick. Drilling avoids having to do any hollowing.
[HANDY TIP No. 1: Colin uses boelube on the drill to keep it moving and avoid burning. Always drill slowly with Forstner bits and frequently extract from the hole to clear shavings.]
Once the desired depth is reached Colin marked that level on the outside so later he would know where to part off the lid of the box. He also marked the position of the curves he wanted to apply to the box. Next the box is de-mounted and a plug inserted in the hollow (top) ready for shaping and to give the box its unique (but not altogether beautiful) off-set shape. Now the block is re-mounted in the off-set spigot with the steb centre holding the off-centre mark at the tailstock end marked in the plug. The shaping must be done carefully with frequent checks to ensure the cuts are not encroaching on the 32 mm hole. If this happens the box will become a sieve.
[HANDY TIP No. 2: Off-set turning can be hazardous if anything goes wrong, so make sure you wear the full face guard and keep fingers clear of the unevenly spinning work piece.]
The box is demounted again and mounted in the real centre ready for parting off the lid. Before completing the cut, turn the rebate in the top of the box ready to take the lid. Also do any finishing work needed at this stage because once the lid is parted off it won’t be possible to do this.
After parting off the lid Colin completed shaping it to the desired form and cut the rebate to fit the box opening.
[HANDY TIP No. 3: When turning shapes, rebates, etc., to fit other shapes and rebates, keep checking for a good fit as you go along. Very easy to take off too much and lose a tight fit.]
Colin shaped the lid as a spinning top with a short handle to enable the top to be spun in a small notch cut in the bottom of the box. To do this he first shaped the bottom of the top (meaning the spinning-top), then turned it round in the chuck to finish the “top” of the top! If you get my meaning.
Great demo from another of our turning gurus. Many thanks Colin.
— Written up by “Club’s Most Consistent Volunteer Reporter” Murray Wilton
O’Dell Toi – Carving
Club meeting 31 July 2019
Report by Earl Culham
O’Dell introduced himself in Maori and then English with his whakapapa, and very interesting it is. A mixture of Irish and other European nationalities and Ngapuhi and other tribes plus Portuguese! Quite a mixture of European and Maori,
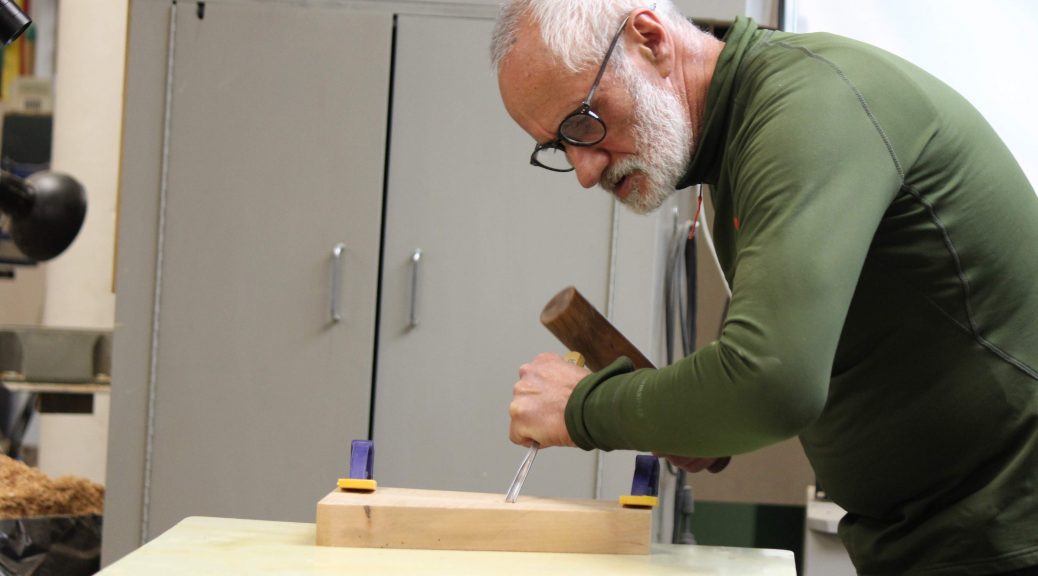
O’Dell was initially in the Army with one of the club members, hence his attendance at the club meeting. His introduction to carving commenced after being given a piece of swamp kauri by his father in law. This experience prompted him to take up carving when he was 45. He decided that he needed to learn Te Reo and the meaning behind Maori carvings. Subsequently, he is now a full time carver and has completed more than 600 carvings. He completed a Batchelors degree at Te Whanana o Aotearoa last year. His philosophy is to pass on what he has learnt to others; “ what I has been taught is mine to share”, he teaches Te Reo and carving
Carving like wood turning takes practice, good chisels and good material to work with. His favourite wood is totara particularly when it is still wet. It cuts beautifully, not so easy when it is dry. You will find that a lot of the old carvings split because they were carved in the same manner.
O’Dell sharpens his chisels with the bottom of the V cut back from the wings (shaped like a waka) and hones them on a piece of 1200grit paper glued to a board; a few strokes on the paper and they are really sharp. His favourite mallet is made of black maire.
In O’Dell’s opinion, the main thing with carving is research. There is a lot of sacredness in Maori carving, all patterns will have a story. In carving there are three key components i.e. simplicity, dominance and contrast. If you take the koru which is a very common design, it is made up of three parts:-
- The Titau. The tightly curled part which recognises new journeys, new beginnings
- The Unahi. The fish scales
- The Te Aho Tapu. The sacred thread that links us to our God or those of non-faith to light.
Another example of design is the pattern on the ribbon attached to the QSM medal. It is designed from Maori mythology and refers to climbing great heights to succeed and bringing knowledge back to others.
O’Dell demonstrated carving the titau, unahi and te aho tapu.
A wonderful introduction to Maori carving, delivered with wit, energy and deep knowledge. Many thanks go to O’Dell for a very interesting and enjoyable evening.
Colin Wise – Wig Stand
Club Meeting: Wednesday 24th July
Report by : Emma James-Ries
The Terms Project for every member, is to make a wig stand for the Look Good Feel Better foundation. To demonstrate this for us, we had Colin Wise making the wig stand that matches the project sheet that can be found on the SAWG website.
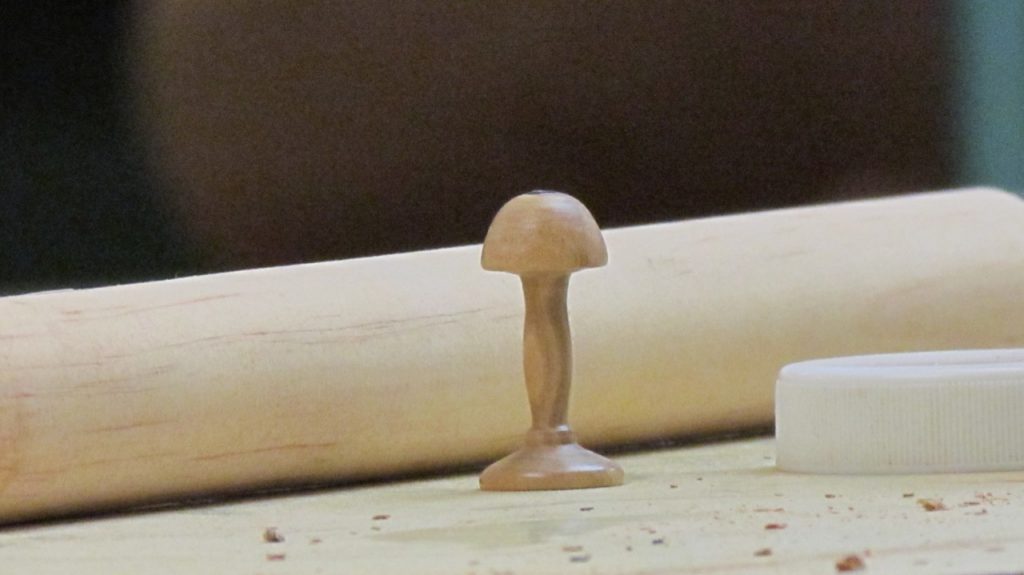
To start off Colin showed us a wig stand he’d made earlier… at 1/12th scale! Setting the miniature aside, he pulled out two respectable wig stands with slight differentiators in shape.
Colin then started out by making the base section first, using a square 160 X 50mm block of spalted Taire timber. He’d already drilled a 25mm hole, in which the stand will fit, and made a spigot on the other side. Turning at a speed of 800 he proceeded to round it off and then shape the base, noting that it is personal preference what shape/decoration you make.
Then take the base spigot off he used a wooden plug that fit into the 25mm hole and then held the plug in the chuck and turned it off. Colin noted here that its best to make a slight concave so contact points of the base are the perimeter only. This will prevent wobbling and give stability when there’s a heavy wet wig on top.
With the base finished, Colin moved on to the head. This piece was a 160 x 110mm square, noting to use a light weight wood for the top. Colin used a steb centre to hold the piece while shaping. He mentioned here that it is important to make sure the edges of the top are either parallel, or slightly curved under so as not to have a protruding edge that would damage a wig.
Finally the last piece to make was the shaft. Colin had an already round piece of wood roughly 240mm long by 40mm in diameter. After mounting the shaft he then used a parting tool to make two 25mm diameter by 14mm long spigots on either end, which will fit into the base and head. Colin said that a slight taper to these spigots helps the glue when assembling. Colin’s personal preference when shaping the stand, was to put a slight bump/bead about 1/3 from the top, this was so you could grip the wig stand when picking it up. But ultimately shaping is up to the makers personal choice.
Colin demonstrated that this was also an excellent time to practice using the skew chisel when shaping the shaft.
Finally Colin assembled the wig stand noting that it’s beneficial to rough up the spigots when gluing, so as to give the best hold. PVA is fine to use for assembling.
On a final note finishes were discussed and emphasised that any wax finishes were a no go. All finishes need to be able to come in contact with a wet wig that will not damage either the wig or the stand. Polyurethane would be a good option.
Thanks for the demo Colin, I look forward to making one shortly! For any extra details for this demo, please see the wig stand project sheet on the SAWG website.
Bob Yandell – Cake Stand
Club meeting 29 May 2019
Report by Earl Culham
Bob showed members two examples of the cake stand he intended to make; a single platter on a pedestal, and a two tier platter with a central supporting column. The demonstration would be how to make the two tier version.
Bob commenced by emphasising the need to attend to the basics i.e. plan your project. A little planning will make the project run smoothly. He suggested that the platters could be made from recycled cupboard doors or old cabinet sides. The central column was to be held together by a threaded rod so that the cake stand could be disassembled for storage.
When planning platter sizes, remember that a standard cake size is 250mm but can range from 200-360mm.
The central column included the base, a central spacer and the top which could be turned to your preferred shape e.g. as a handle.
Bob had prepared his support column by drilling a hole through his base, centre spacer and top for the threaded rod. A recess was drilled in the bottom of the base to take the jaws of a 50mm chuck and later the assembly nut. The platters had been cut to round on the band saw and a centre hole drilled to take a spigot.
Once the base had been shaped, the next task was to turn the first platter to round. Bob fitted the base to the platter using the spigot and using the tail stock, pressed the platter against a large disc mounted on a faceplate. With the lathe running at a slower speed, this was a quick and effective method of holding the work for finishing.
The centre spacer was turned to shape and the same method of using tail stock pressure for holding the second platter would have been used. However there was a technical problem and the project was not completed.
Thanks Bob for a well planned demonstration.
Terry Scott – Pens
So the plan was to have a hands on night, where each member of the club made a slimline pen.
As there have been many new members since the last attempt at something similar, Terry started with a “short” demo. Of course Terry the proceeded to try and get everything he could about how to make a pen into the demo, here is a quick report of the major points.
Blank – 20mm square cut slightly longer than tubes
Mark to keep grain aligned
Drill a 7mm hole for the tube – alternative methods of drill press with jig or on lathe using pin or pen jaws were discussed
With lathe option about 500rpm. Make sure you align the lathe head first.
Rough up the outside of the brass tube with some sandpaper
Put potato plug in end of the tube to prevent glue going in.
Glue into blank with superglue
Mill ends of blank – don’t use vice as may stretch brass tube.
Put the blanks on a pen mandrel with bushes to match pen kit.
Mandrel saver (live centre) presented as an option instead of default knurled nut.
Turn lathe up fast as you are turning a very small diameter.
Cut from the centre out with spindle roughing gouge.
Skew for finishing cuts
Sand through grits -240 320 400
Use U-Beaut EEE-ULTRA SHINE to get a high polish.
Terry the used SHELLAWAX GLOW to finish.
Take the matching pair you have just turned – keeping the grain aligned. Terry suggested if turning a lot of pens to make up a board with 4 inch nails to keep them together.

Assemble pen – taking care to put mechanism in correct distance into the pen to have the point protrude the correct distance and allow it to retract.
Terry then gave a quick demo of the disassembly process if you want to refinish a warn pen or replace some parts.
The crowd then went to the lathes and the real fun began. Many people taking home a successful first pen.
Thanks Terry.