Club Meeting: 6 April 2016
Report By: Murray Wilton
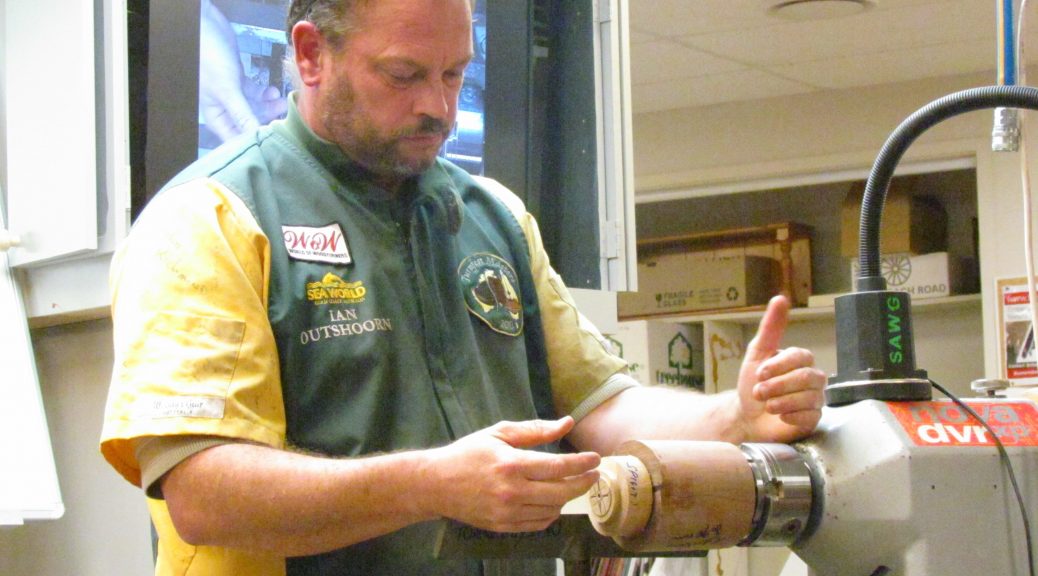
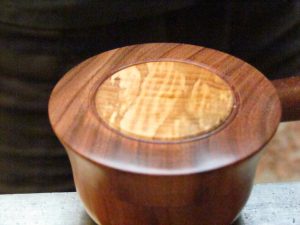
Well known to our members, Ian is from the North Shore Guild. He began his demo by showing us a mock-up of the finished article in solid form. This was to give an idea of outer shape and form, as well as to illustrate what the finished lid insert would look like. The “box” could be described as tiny, measuring about 75 X 75 X 75.
Wear a safety mask! Ian is strong on the need for safety in the workplace and he carried out his demo with the full gear in place.
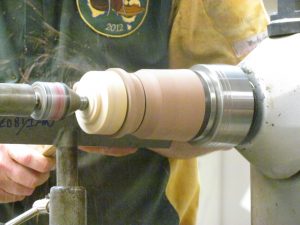
Ian starts with a block 90 X 90 X 120 which allows plenty of waste and allowance for any blunders which can happen when working with small pieces. Choose a darker timber to produce a contrast with the insert. Small work of this kind is enhanced by using a chuck and/or live centre at each end. Held in a chuck at the headstock end and a live centre at tailstock end allows initial roughing down to round to be achieved accurately. Ian then replaces the live centre with a drill chuck holding a 48mm Forstner bit to make an initial hole for the lid insert, about 10 mm deep. This means the tailstock end is the lid end of the starting block. The hole must be drilled carefully and the drill must be sharp as Forstner bits sometimes tear the timber. (“This is my way”, Ian responded to those who suggested it might be easier to simply turn the insert with a suitable chisel.)
The insert is produced by fixing a glue block into the chuck with a 50 X 50 X 15 mm piece of contrasting timber (rewarewa or copper beech in Ian’s case) glued with Titebond to the outer face. The insert also serves as a spigot for later use. The glue block can be turned at a relatively high speed because of its small diameter. Using a parting tool the insert on the glue block is trimmed to same diameter as the 48 mm Forstner hole. It must be a perfect fit so great care has to be taken. Also, the insert has to bottom out in the main block hole so make sure it isn’t too thin. Leave enough clear to make a spigot.
Next mark the glue block with “top” and “bottom” at each end of the insert grain to ensure insert and main block grains line up when the two blocks come together. Place the main block in a second chuck at the tailstock end and line up with the glue block so grains are in same direction. Apply superglue to the edges only of the insert and wind the tailstock in to meet the headstock and fit the pieces firmly together.
When dry, remove from both chucks and insert the main block and glue block together into the headstock chuck, using a live centre at tailstock end to hold the insert. (You are totally confused by this stage so please study Ross Johnson’s excellent photos to see what I’m trying to tell you!) Now begin turning the whole assembly to the desired final box diameter (about 75 mm).
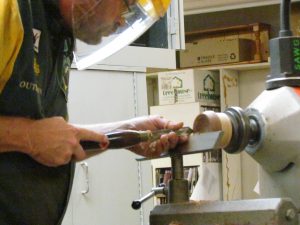
This is where you need to be clear about the depth of the lid insert so that when you part off the lid you will know whether or not the insert will show on the under side of the lid (your choice). Mark the desired depth of the lid (say 10 mm) and use a 10 mm bowl gouge to turn the lid to required outer shape. Turn a spigot in the insert above the top line of the lid. When completed, part off the lid at the marked line and use a draw saw (available from Carbatec) to complete the cut, slowly and carefully to avoid burning.

Re-position the now separate lid in the headstock chuck using the spigot you have just turned and finish lid to desired shape. This means any hollowing you want in the lid as well as the rebate which will position the lid snugly on the base. Now replace the base of the box in the chuck, bottom end to headstock. Carefully measure the lid inside diameter (of rebate) and mark where the hollowing edge has to finish to ensure the box rebate fits perfectly to the lid rebate. Before starting the box hollowing, jam-fit the lid on the box, rebate-to-rebate, with the grains lined up. This is so that you can finish off the lid. The lid end (glue block still attached) is held by a live centre in the tailstock. Tape the joint to avoid any tendency to twist during the lid finishing work. Part off most of the glue block, withdraw the tailstock and live centre and complete finishing work to top of lid. Normally turn from centre of lid outwards, but if this causes tearing of the insert, work the other way. At this stage add beads if you want them.
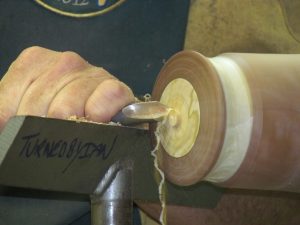
Complete the job by removing the lid and finish the hollowing of the box as well as any external finishing needed. Finally part off the bottom of the box.
Ian warned that making small lidded boxes is delicate work requiring a great deal of patience and careful turning. After making several of these little pieces, Ian says he is still learning, so don’t be discouraged if your first attempt isn’t a raving success. Thanks, Ian, for a top-of-the-class demo.