Top Gears Unmasked by Fred Irvine, Hamilton Woodturners Guild
Club Meeting: 2 March 2016
Report by Earl Culham
While waiting for the meeting to commence, I watched a couple of SAWG helpers bringing to the demonstration area, a number of strange pieces of equipment. As more and more bits and pieces were delivered my disquiet grew, how the hell was I going to report on this and make sense of it to fellow attendees who would later want to review the meeting, and those who had been unable to attend and who wanted to catch up. Whew, Bruce had handed me the hot potato tonight!
Fred commenced his demonstration with some reminiscing about attending the club close to its foundation in 1988; Mac was able to fill him in with the appropriate information. He then commented that each person who is a woodturner has their own favourite projects, whether it is making bowls or other objects which please the creator. His favourite has been in combining timbers and making objects such as gear wheels.
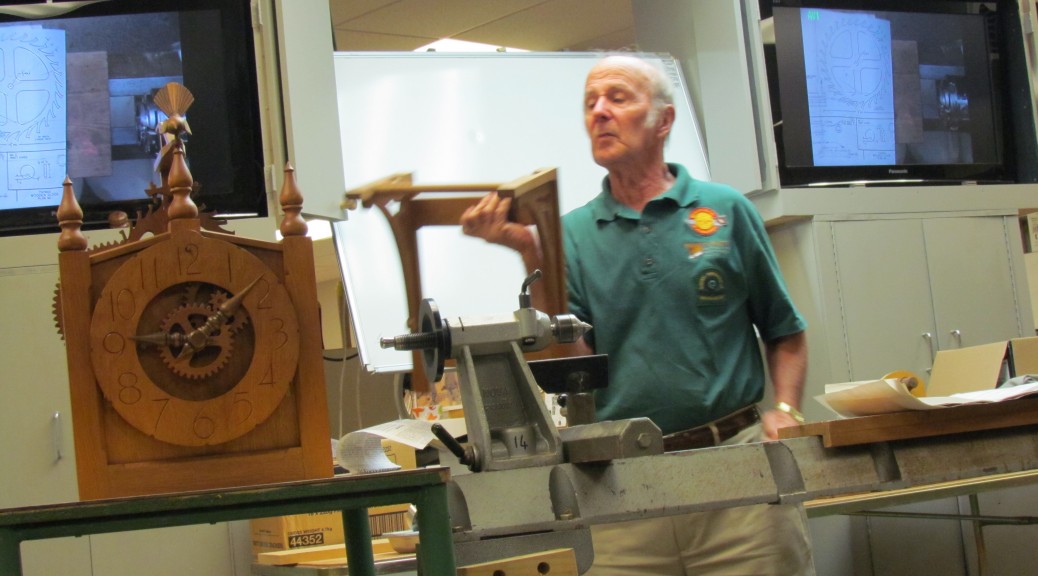
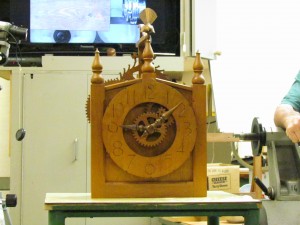
Fred displayed a large wooden clock that he had made some 30 years ago, as his first effort in making gears. The clock was a work of art, including a carved Chatham Island fantail and finials, which incidentally were added as embellishment and not part of the original plan. He cut the gears out using a scroll saw from a plan which he showed to the meeting.
The instructions with the plan were to cut out the diagrams of the gears and paste them on to the wood to be used. There is a snag in this method and Fred proceeded to demonstrate what that was.
Fred showed that a sheet of newspaper can be torn in a straight line if it is done down the page, but try to tear a straight line across the page and it won’t work. This of course, is due to the grain in the paper. He then produced two strips of paper the same width, one of which was placed in water to soak for a few minutes the other laid out flat. When the soaked piece was laid beside the control sample, the soaked piece was longer, indicating that paper expands with moisture by about 2.1%. Therefore, the suggestion in the instructions to paste the paper to a piece of timber would result in the gear being oversized and inaccurate.
When making his clock, Fred drew out the escapement wheel onto a piece of plastic, plotted 30 points for the cogs, then used this as a template to ensure that the gear was cut accurately.
Selection of material to use is important, to make this clock, Fred chose rata. He said that if he was to make another clock, he would make the rata into a ply wood for stability.
The clock usually hangs on the wall by a bracket which he showed to the meeting. The movement is powered by a large weight which has been encased in rata and has a pulley wheel on the top so that the weight can move on the cable or chain (not sure which Fred uses on his clock). The weight is rewound using a wooden key. A pendulum which is quite long has a sliding weight which can be used to adjust the time. The clock when it is working has a lovely sound.
Fred said he has no idea how many hours it took to make the clock using a scroll saw to cut out all of the gears, but it was an enjoyable experience and he learnt an awful lot during its construction.
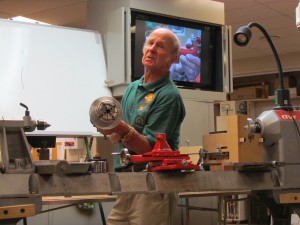
As an introduction to the next item in the demonstration, Fred showed a photograph of a traction engine with two large trailers loaded with wool bales. This traction engine towed the trailers on wooden wheels for 100 miles. A beautifully made model traction engine was then produced.
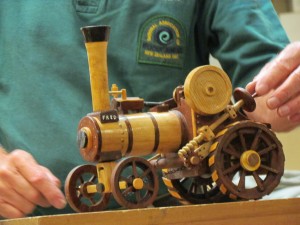
The engine was made by a fellow member of the Waikato guild with Fred assisting with the making of gears and wheels. The engine is a scale model made in different coloured wood with a moving piston, wheels and steering worm. It is a work of art.
Rather than using a scroll saw to make the gears as had been done for the clock, Fred now uses an ornamental cutter. This is attached to the headstock, and a complicated jig mounted on the lathe bed is used to hold the material which will be made into the gear. Unfortunately, the jig could not be fitted to the club lathe so a demonstration of its use was not possible. It would be very confusing if I tried to paint a word picture of this complicated apparatus so I won’t, but it certainly looked like a piece of equipment that was fit for purpose and that had taken a lot of thought and skill to make.
Fred uses a book titled “Gears and Gear Cutting” by Ivan Lowe as a reference book, in his words, it is a very good book and easy to read.
The next piece of equipment produced for our edification assisted Fred in making the correct shape and size of the cutter used in the ornamental cutter. The cutter is quite small and difficult to shape without a method of making an enlargement of it. To do this, Fred made his own epidioscope. If like me, you had never heard of this piece of equipment, here is the Google definition:- The opaque projector, epidioscope, epidiascope or episcope is a device which displays opaque materials by shining a bright lamp onto the object from above. A system of mirrors, prisms and/or imaging lenses is used to focus an image of the material onto a viewing screen. By using the epidioscope, Fred is able to see where the shape is not quite right, mark the cutter with blue, and then reshape as needed.
Last but not least, another piece of machinery was produced which is used for cutting threads on objects such as screw topped lidded boxes, and was used to make the worm which operates the steering on the model traction engine. The tool has the capacity to make different threads as well as left hand threads. Examples of threaded wooden tools were shown including threaded clamps, wooden gauges and old lidded boxes which held threaded candle holders.
Thanks Fred for an interesting and informative demonstration.